Ask Reuben – January 21, 2025
Color Picker
How can I implement a Color Picker?
How can I customise a widget using GBC Customisation?
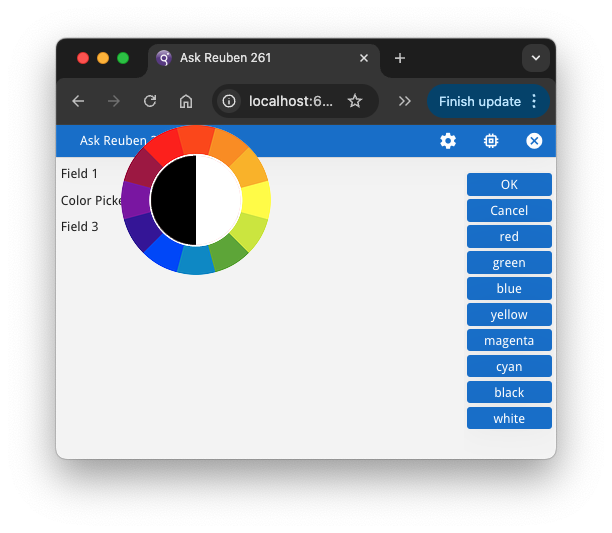
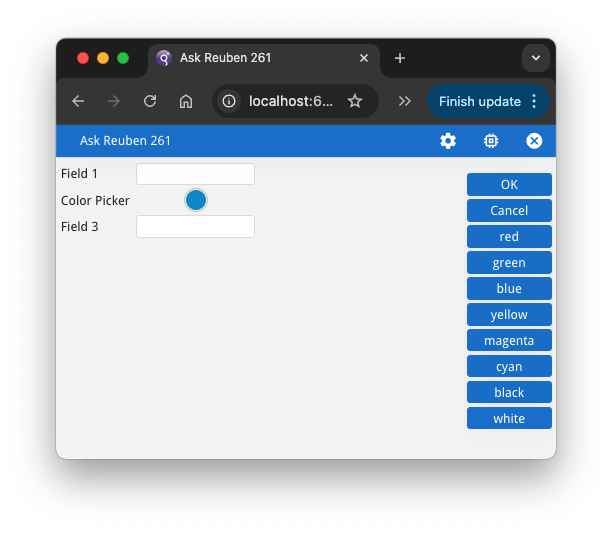
Those at the Cancun WWDC24 event may recall during Jean and Mario Customer Experience presentation, I pointed out that in their screen that allowed end-users to define a color used in their generic reports, currently their users have to type in a color, wouldn’t it be better to have them select a color from a GUI widget? The reason I pointed that out was for a number of reasons but they included: The good news is that in the recent GBC 5.00.10 release, we shipped a Color Picker example in the customization area. If you follow the instructions you can incorporate it into your own customization. If you followed those instructions and added it to our customisation, a relatively simple program like the following can be used to demonstrate and test. If you click on the field that has STYLE=”colorpicker”, you get a widget that allows you to select a color. Instead of displaying the RGB value, the widget is a circle in the selected color. The screenshot shows the widget that appears and how the selected color is displayed …


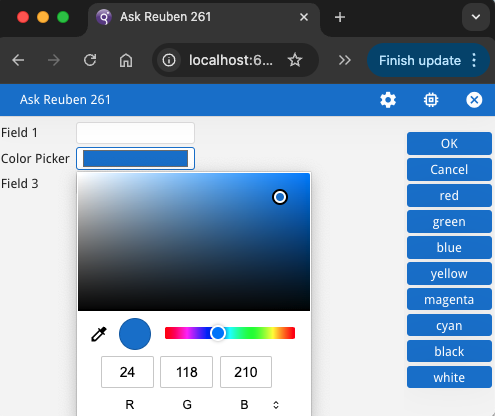
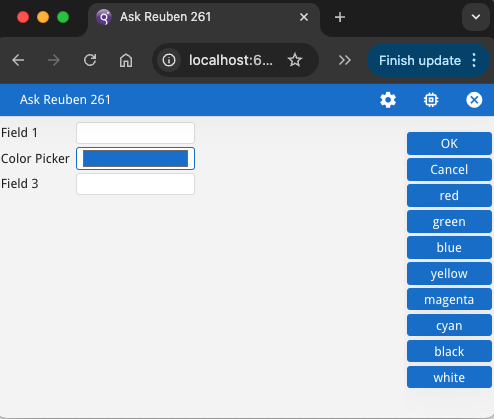
Now one interesting point (and it is why I have added the ON ACTION dialogtouched, ON CHANGE, AFTER FIELD blocks) is to note when these events are triggered. The widget overridden is the EDIT widget so you don’t get the characteristics of other GUI widgets such as RADIOGROUP, COMBOBOX where ON CHANGE is immediately triggered when the user makes a change. You get the characteristics of an EDIT whereby ON CHANGE is triggered when the user exits the field and the value is different. You can get an immediate response when a user makes a change in the widget by the use of ON ACTION dialogtouched, I have used the INFIELD clause so that the dialogtouched action is only active when the user is in that particular field, you don’t want it active in all fields. To see how the widget is customised, have a look at the source in GBC_PROJECT_DIR/customization/colorpicker and read in conjunction with the documentation on Customizing your Application using Widgets. A key line is this one in js/ColorPickerWidget.js … This is what determines that any EDIT that has STYLE=”colorpicker” will use this customisation. Now the neat thing about GBC Customization is that you are not limited to use that customisation. If you can come up with your own color picker widget you can add that code into your GBC Customisation. To illustrate this , I have included another Color Picker customisation. Using the customisation source at the end of this article, you can build another Color Picker widget. This makes use of input type=”color” and a GUI Color Picker widget that is included in most browsers. See the w3schools article on input type=”color”. and run the Try it yourself example on that page. In the corresponding Mozilla documentation page you will note that his feature is supported on nearly all browsers, at the time of writing only Firefox for Android does not have full support. Using the earlier example, you can run this customisation with a few changes. In the .per, uncomment this line … and comment out the previous line so that the STYLE is now colorpicker_custom. Add to a .4st (and uncomment the line to load a .4st), the following Style and StyleAttribute… In ColorWidget.js, you will note that the registerBuilder line is This says that any EDIT widget that has the StyleAttribute “customWidget” set to the value “color” will use this customisation. Running the modified example program with this Customisation, you should now get the following, again Before screenshot shows the color being selected and the After screenshot shows how it is rendered in the form. Again the value behind the scenes is the RGB value. …MAIN
DEFINE rec RECORD
field1 STRING,
field2 STRING,
field3 STRING
END RECORD
DEFINE program_name STRING
WHENEVER ANY ERROR STOP
DEFER INTERRUPT
DEFER QUIT
OPTIONS FIELD ORDER FORM
OPTIONS INPUT WRAP
CONNECT TO ":memory:+driver='dbmsqt'"
LET program_name = base.Application.getProgramName()
#CALL ui.Interface.loadStyles(program_name)
CALL ui.Dialog.setDefaultUnbuffered(TRUE)
CLOSE WINDOW SCREEN
OPEN WINDOW w WITH FORM program_name ATTRIBUTES(TEXT = program_name)
INPUT BY NAME rec.* ATTRIBUTES(WITHOUT DEFAULTS = TRUE)
BEFORE FIELD field2
MESSAGE "BEFORE FIELD field2 triggered at ", CURRENT HOUR TO FRACTION(2), " value is :", rec.field2
ON CHANGE field2
ERROR "ON CHANGE field2 triggered at ", CURRENT HOUR TO FRACTION(2), " value is :", rec.field2
ON ACTION dialogtouched INFIELD field2
MESSAGE "ON ACTION dialogtouched INFIELD field2 triggered at ", CURRENT HOUR TO FRACTION(2), " value is :",
FGL_DIALOG_GETBUFFER()
AFTER FIELD field2
MESSAGE "AFTER FIELD field2 triggered at ", CURRENT HOUR TO FRACTION(2), " value is :", rec.field2
ON ACTION red
LET rec.field2 = "#FF0000"
ON ACTION green
LET rec.field2 = "#00FF00"
ON ACTION blue
LET rec.field2 = "#0000FF"
ON ACTION yellow
LET rec.field2 = "#FFFF00"
ON ACTION magenta
LET rec.field2 = "#FF00FF"
ON ACTION cyan
LET rec.field2 = "#00FFFF"
ON ACTION black
LET rec.field2 = "#000000"
ON ACTION white
LET rec.field2 = "#FFFFFF"
END INPUT
END MAIN
LAYOUT
GRID
{
Field 1      [f01         ]
Color Picker [f02         ]
Field 3      [f03         ]


}
END
END

ATTRIBUTES
EDIT f01 = formonly.field1;
#EDIT f02 = formonly.field2 ,STYLE="colorpicker";-- Shipped customization
EDIT f02 = formonly.field2, STYLE="colorpicker_custom"; -- Reubens customization
EDIT f03 = formonly.field3;


INSTRUCTIONS
SCREEN RECORD scr(field1, field2, field3);
     * Register our custom widget 'colorpicker' as a replacement of the default Edit widget for all Edit having style='colorpicker'
     */
    cls.WidgetFactory.registerBuilder("Edit.colorpicker", cls.ColorPickerWidget);
EDIT f02 = formonly.field2, STYLE="colorpicker_custom";
<Style name="Edit.colorpicker_custom" >
    <StyleAttribute name="customWidget" value="color" />
</Style>
cls.WidgetFactory.registerBuilder("Edit[customWidget=color]", cls.ColorWidget);


Which customisation you use is up to you. The important things to note are … Note: in the code below, remove the #! , this is the location and file name you should use.
#! config.json
{
  "compile": {
    "mode": "cdev",
    "customization": "customization/colorpicker_via_inputtype"
  },
  "customizationSuffix" : "colorpicker_via_inputtype",
  "themes": [{
      "name": "default",
      "title": "Default"
    }
  ]
}
#! js/ColorWidget.js

"use strict";

modulum('ColorWidget', ['EditWidget', 'WidgetFactory'],
  function(context, cls) {

    cls.ColorWidget = context.oo.Class(cls.EditWidget, function($super) {
      return {
        __name: "ColorWidget",

        /* your custom code */
        _inputType: 'color',

setType: function(valType) {
              this._inputElement.setAttribute('type', 'color');
        },

/* TODO figure out how to trip on change */

/* TODO, perhaps use list presets to do versions with TTY and/or HTML named colors see https://stackoverflow.com/questions/74910447/getting-color-input-name-instead-of-hex-datalist-of-colors */
      };
    });
    cls.WidgetFactory.registerBuilder("Edit[customWidget=color]", cls.ColorWidget);
  });
#! js/ColorWidget.tpl.html

<!--
 FOURJS_START_COPYRIGHT(D,2014)
 Property of Four Js*
 (c) Copyright Four Js 2014, 2024. All Rights Reserved.
 * Trademark of Four Js Development Tools Europe Ltd
   in the United States and elsewhere

 This file can be modified by licensees according to the
 product manual.
 FOURJS_END_COPYRIGHT
-->
<div class="mt-field gbc_dataContentPlaceholder">
  <input type="color" class="gbc-label-text-container" autocomplete="new-password"/>
</div>

