Configure your environment for Genero Web Client for JavaScript (GWC-JS)
customization.
Before you beginYou must have the node.js and
git tools installed on your system. See Install tools.
-
Navigate to your FGLASDIR/tpl directory. Locate the GWC-JS customization
project zip file (in the format of
fjs-gwc-js-xxx-build123456789-project.zip)
and unzip it.
You can unzip the project file anywhere you wish, however there are some things to consider:
CAUTION:
- It is recommended that you not use the FGLASDIR/web/ directory, as this is
the public directory where your sources may be exposed.
- To avoid losing your project when you upgrade the GAS, consider not placing your project in the
FGLASDIR path.
The customization project zip file name is identified by:
- gwc-js-xxx is the version number, for example
gwc-js-1.00.02
- 123456789 is the build number consisting of a date-time
stamp, for example 201504141750.
A directory is created in the extracted location using the project version number as
the title, in the format of gwc-js-xxx. This is your
project_dir. See Project directory.
-
Install all necessary tools in the following steps:
Tip: Installation steps are also found in your
project_dir/readme.md file.
-
Open the Node.js command prompt window.
-
Navigate to your project_dir
-
Install the Node Package Manager (npm) and its dependencies, type:
npm install
Only run the following two commands with the global option (-g) if this
is the first time you have installed Node.js on the machine.
npm install -g grunt-cli
npm install -g bower
Note: They must be run at administrator level on Windows®, or as the user with privileges to install in Linux®/UNIX™ or MAC®
OS®.
As tools are installed, you see tasks being run as components are updated.
-
To finalize, install the dependencies by typing:
grunt deps
The grunt deps command outputs a graphical
report at the end showing that the npm and bower dependency
packages have been updated successfully.
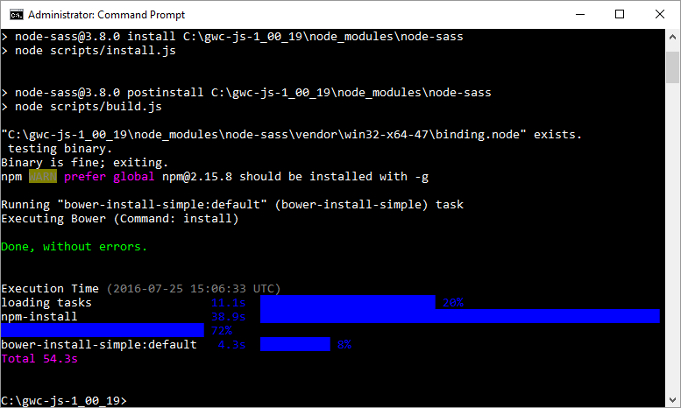
Figure 1. grunt deps command updates dependencies
If you encounter any problems during the installation, see Troubleshooting environment configuration. Tip: For installation on Linux/UNIX,
you can use the Node Version Manager (
nvm) tool
nvm tool instead of
npm. It allows you to switch between different versions of node. To install and
use, for example, node.js 4.2.2, run these
commands:
nvm install 4.2.2
nvm use 4.2.2
-
Run grunt --customization=customization/default.
The grunt command builds the project with default compilation
options. A dist directory is created in project_dir, and a
compiled version of the GWC-JS front-end is written to the
dist/customization/default directory.
-
Create a symbolic link to
project_dir/dist/customization/default in your
FGLASDIR/web directory.
Navigate to FGLASDIR/web/
- On Windows®, run the command as administrator:
mklink /D link_name project_dir/dist/customization/default
Important: You must run the command as administrator, it is not enough to simply have
administrator permissions.
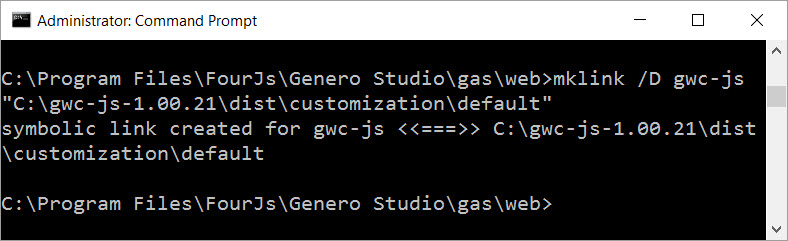
Figure 2. Create Symbolic Link in Windows
- On Linux/UNIX,
run the command
ln -s project_dir/dist/customization/default link_name
Tip: Alternatively, you can configure the
GWC_JS_LOOKUP_PATH element to specify the
path to your custom GWC-JS front-end.
You can now use your customized GWC-JS front-end directly in your local GAS
server.
What to do nextYou are all ready to begin your customization. See Create customization project.