Before proceeding, register an application with the external Identity Provider (for example:
Azure AD, Google, or Okta) and record the Issuer URL, Client ID, and Client Secret. These values
will be required during the following configuration steps. Registration steps with IdPs vary by
provider; consult the external IdP's documentation for instructions on creating an application and
retrieving these values.
Open the Console App and navigate to the ID provider menu.
The Console App is located at
http[s]://host:port/[gas/]ua/r/admin/ConsoleApp.
Alternatively,
open the GAS demos page (demos.html) and launch the Console App from there. If
GAS is running in standalone mode, go to:
http://localhost:6394/demos.html
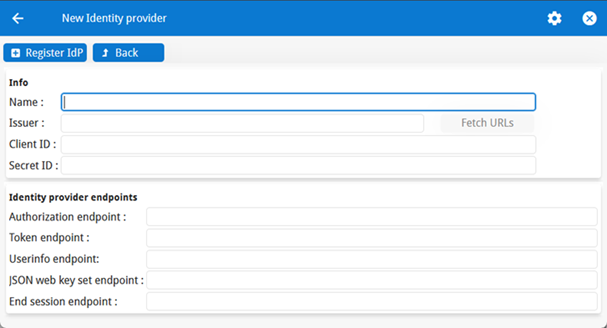
Select New to create a new Identity Provider.
Enter the required information for the Identity Provider:
Figure: Register a new Identity Provider Where:
Name is a label for the Identity Provider (for example, "AzureAD").
Issuer is the Identity Provider's issuer URL (for example,
https://login.microsoftonline.com/tenant/v2.0).
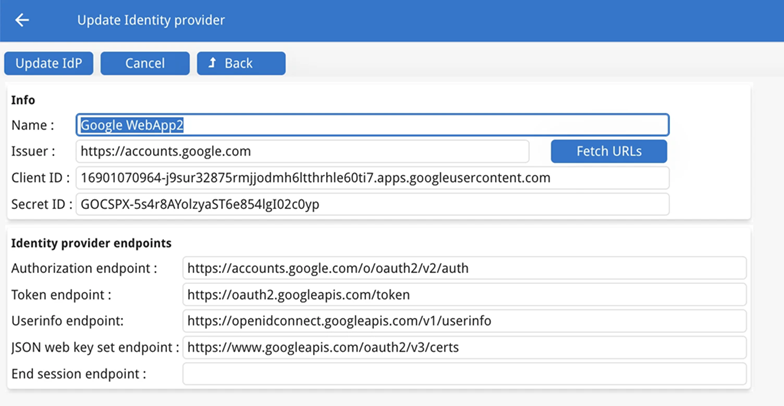
When the
Issuer URL is valid, click Fetch URLs to auto-populate the identity provider
endpoint fields. GIP checks the Issuer URL by fetching the OpenID Connect discovery document
(/.well-known/openid-configuration) and enables Fetch URLs if required
endpoints are found.Figure: Fetch URLs directly from the IdP
Client ID is the client/application ID registered with the Identity
Provider.
Secret ID is the client secret associated with the client ID, used for
authentication.
Save the new Identity Provider.
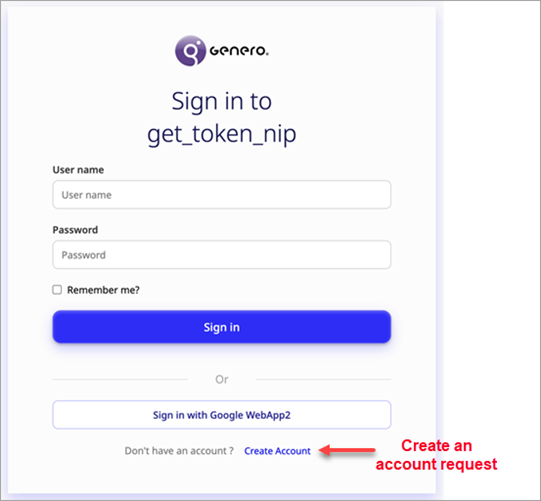
The GIP sign-in page will now display an option for users to select and authenticate with the
registered Identity Provider. Figure: GIP sign-in screen with create account option for external IdP
Users will first have to request a delegated
account using their credentials from the external IdP, wait for the GIP administrator to
validate it, and only then will they be able to authenticate using the external IdP.