Follow these steps to interact with a database meta-schema for developing forms,
reports, and services.
Before you begin: The OfficeStore project must be
opened in the Project view.
-
Expand the OfficeStore Model project.
-
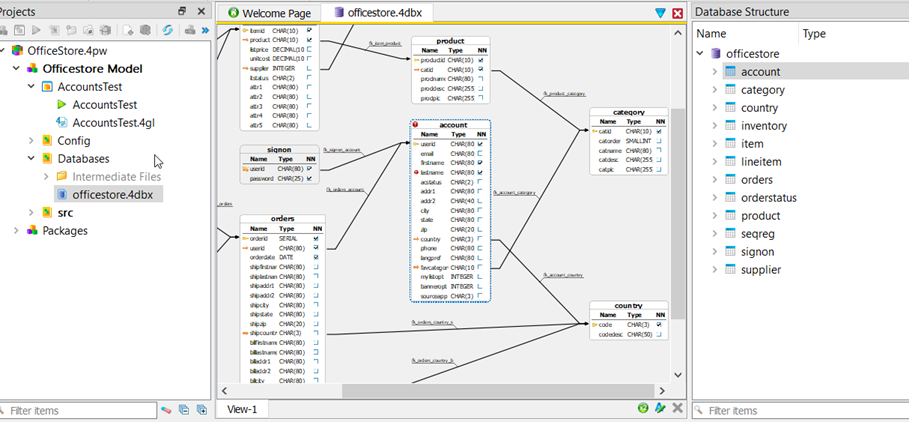
Under the Databases node, doubleclick on the
officestore.4dbx file.
The file opens in the Meta-schema manager.
Figure: Meta-schema manager
-
Note the layout of the tables and columns and the defined join relationships
between them.
Tip:
Zoom in and out by holding down the Ctrl key while using
the mouse wheel.
-
Select . Note that you can print any diagram in a variety of ways. Close
the Print preview dialog.
-
Find the
account table. Select the lastname
column and modify its column length from 80 to 120.
-
Save your changes. Note that the diagram reflects that the schema is different
from the database by flagging the modified column.
-
Select , and click Generate.
A 4gl file is created for you and opened in the
Code Editor.
-
Close the Code Editor (do not save the file) to complete this section of the
tour.