Model the app

The Business Application (BA) diagram allows you to model your application graphically.

In this quick start, you create a form based on a database table and implement the program.

  1. Go to Project > src > Applicationflow and open the appflow.4ba file.
    This is your Business Application (BA) diagram, which shows the flow of your program. It includes one program entity (Main) and one CRUD form entity (form).
  2. Right-click on the Form entity and select Implement CRUD Form from Database to generate a form for the database table that you wish to access.
  3. Select the account_record table. Use the double right arrow to add all fields to the Selected Fields list, and click Next.
    Figure: New Form from Database wizard Column selection

    This figure is a screenshot of New Form from Database wizard Column selection. The account_record table and the double-right arrow are highlighted, indicating that all fields from the account_record table are selected.
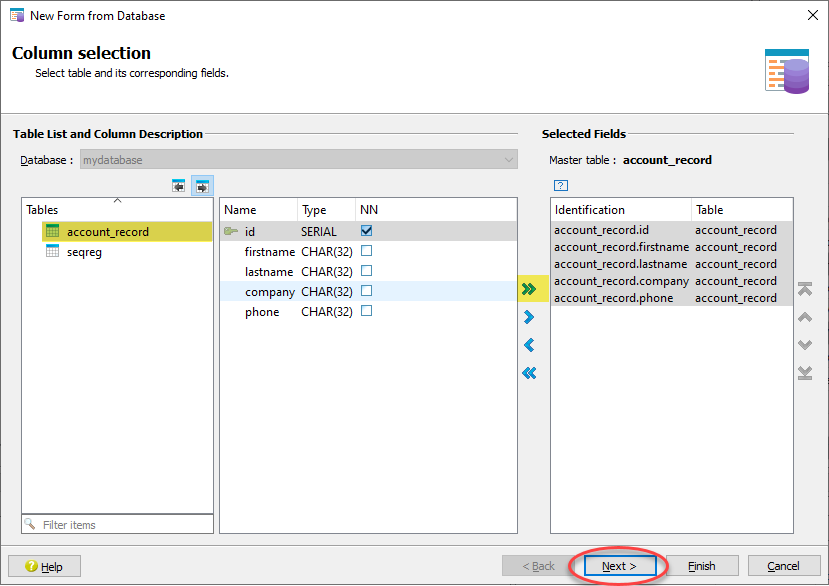
  4. Set Number of fields to 1, and click Finish.
    Figure: New Form from Database wizard container selection

    This figure is a screenshot of New Form from Database wizard Container selection. The "Number of fields" property is highlighted and set to 1.

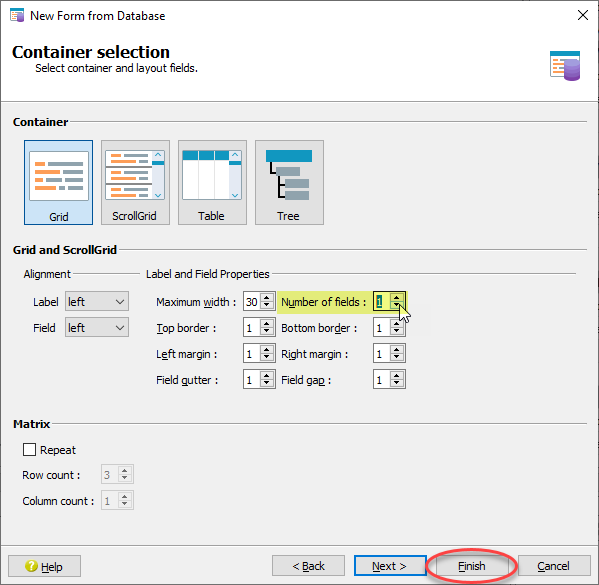
    The fields are added to the form, contained in a grid container.

  5. Save the form in the $ProjectDir/src directory and insert it in the project under the src/Entities node.
    Figure: Saving the form
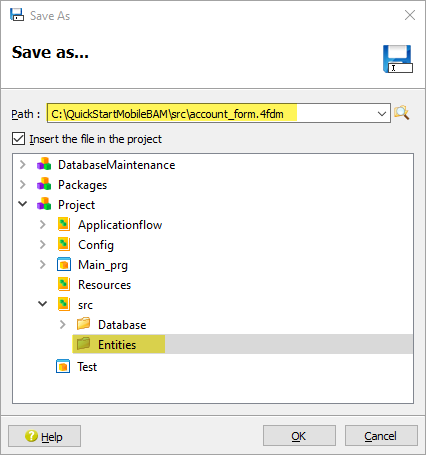
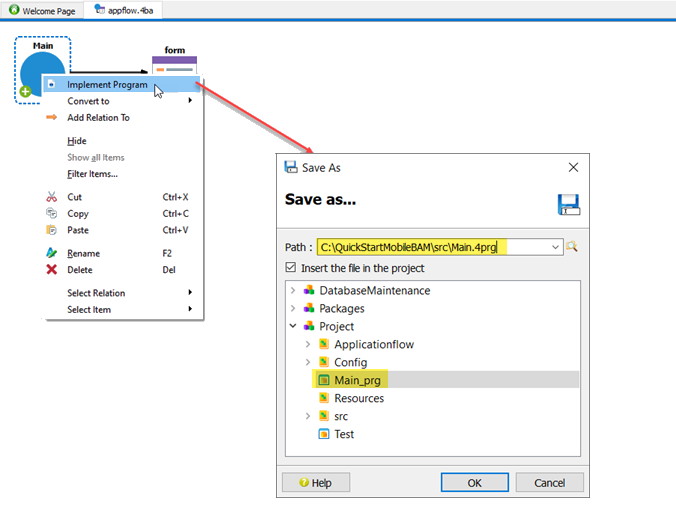
    This figure is a screenshot of the Save As dialog, where the form is saved as "C:\QuickStartMobileBAM\src\account_form.4fdm" and is included in the project under "Project/src/Entities".
  6. Return to the appflow.4ba file.
  7. Right-click the Main program entity and select Implement Program.
  8. Save the program file as Main.4prg in the $ProjectDir/src directory, and insert it in the project under the Main_prg node. This file is used to generate the source code for the main function. Click OK to close the Save As dialog.
    Figure: Implementing and saving the program

    This figure is a screenshot of appflow.4ba diagram and the Save As dialog.
  9. Select File > Save all.