A default database meta-schema file, mydatabase.4dbx, is provided.
You will edit this file to contain information about the tables, columns, and relations of
the relational database that is needed by your app.
In the Project group, expand the Database node
and open mydatabase.4dbx.
The Meta-Schema Manager is launched for viewing and modifying the schema.
Note:
The meta-schema diagram includes a seqreg table. For this quick start, you do not need to worry
about this table. For more information about what this table does, go to Managing SERIALs in a generated application.
Right-click within the Documents view and select Add Table. Set the
table name to account_record.
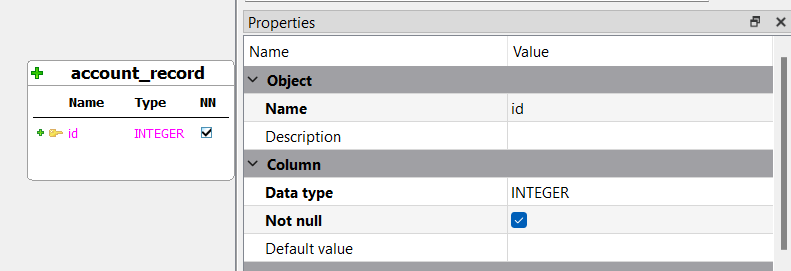
Edit the existing column:
Set the Name property to
id.
From the Data type dropdown box, select
INTEGER.
Select the Not null checkbox.
Right-click the column and select Set as Primary
Key.
Tip:
The primary key is identified by the key icon.
Figure: Edit column properties
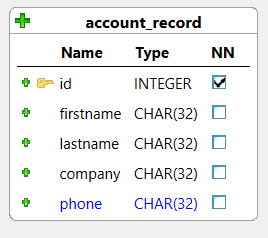
Right-click on the table and select Add Column. Set the
Name of the new column to firstname,
the Data type to CHAR, and the
Length to 32.
Add three more columns: lastname, company,
and phone. Give all these columns a Data
type of CHAR and a
Length to 32, as in Figure 2.
Figure: Create table
Select File > Save All.
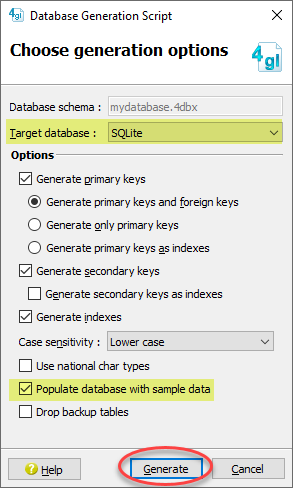
In the Projects view, right-click on mydatabase.4dbx and select Generate Database Creation Script.
From the Target database dropdown, select
SQLite.
Select Populate database with sample data.
Click Generate.
Figure: Generate Database Creation Script
A .4gl file is generated.
Select File > Save.
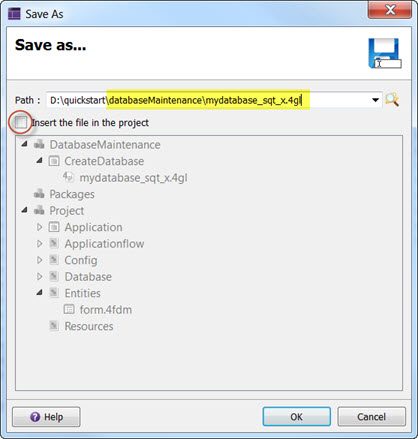
Figure: Save to databaseMaintenance subdirectory
In the Path field, enter
$ProjectDir\databaseMaintenance\mydatabase_sqt_x.4gl.
Deselect the Insert the file in the project
option as the file is already in the project; you are
just saving the file to disk.
Click OK.
You will be asked if you want to overwrite the default file. Click
Yes.
Create and populate the database:
Expand the DatabaseMaintenance group and the
CreateDatabase application node.
Select the CreateDatabase configuration (green
arrow) and ensure its Binary Name property is set
to mydatabase_sqt_x.
Right-click on the CreateDatabase configuration
and select Execute.
Note:
This sample data comes from the Studio Libraries. If populating the
database does not work (for example, you might have changed to an
older version of FGL), try recompiling the Studio Libraries.