Add a remote host
To connect a Genero Studio client to a remote Genero Studio Server, add the remote server to the Hosts defined in Genero Studio Configurations and define a remote configuration for that server.
- Start Genero Studio on the client.
-
Select Tools > Server connections or select the Server Connections button in the lower right
corner.

-
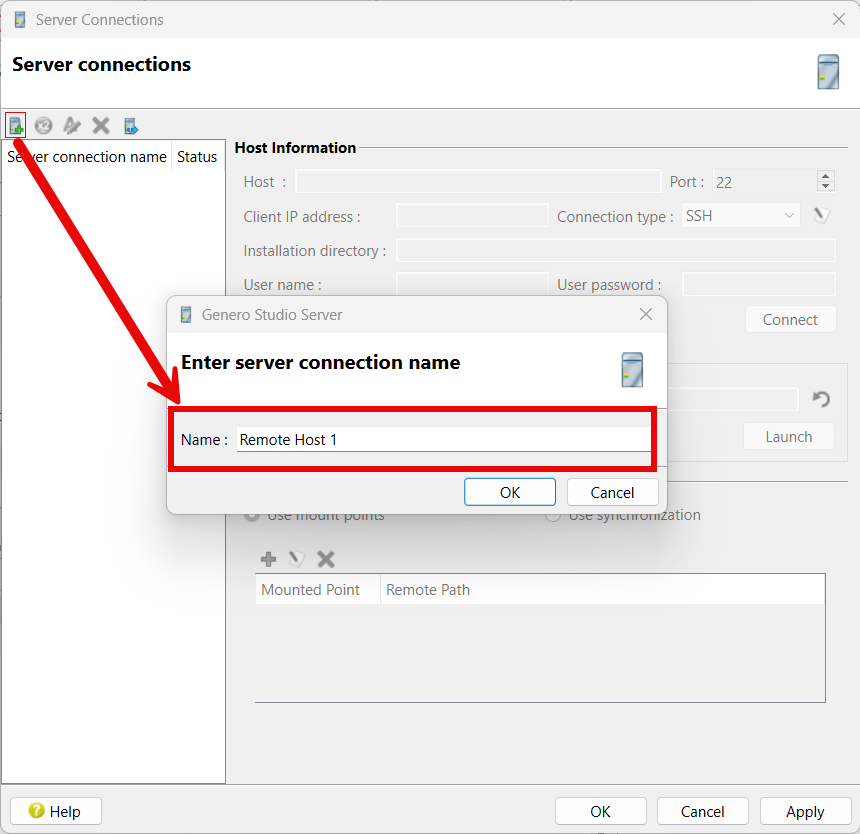
Select the button in the integrated Toolbar to Add a Genero Studio
server.
Figure: Add a Genero Studio server 
-
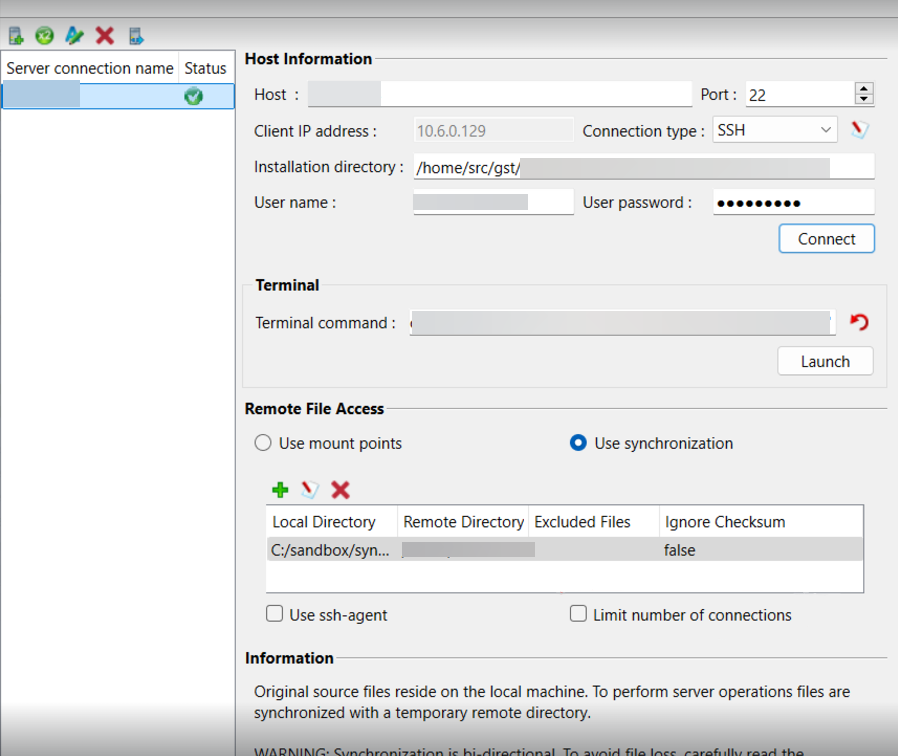
Enter the Host Information.
Figure: Host Information 
- Host
- Hostname or IP address where Genero Studio Server is running.
- Port
- Enter the port number you have configured SSH to listen on. The default SSH port number is 22. If you are using TCP (deprecated), enter the port number used when Genero Studio Server was started. The default port number is 5321.
- Client IP address
- IP address of the client as viewed by the server. Displays the value of the IP address to be used by the GDC settings when <Automatic> is set.
- Connection type
- SSH (default) or TCP (deprecated). Click the icon
to open the SSH Connection Arguments dialog. This dialog specifies additional
arguments that are passed to the command used to start
gsserver.- On Unix/Linux, the
sshcommand is used. - On Windows, the
plinkcommand is used.
gsserver. However, you may need to provide arguments when:- The SSH server requires compatibility options for the connection to succeed.
- You need to pass specific parameters such as authentication or session configuration flags.
-m filename, enter:-m filename - On Unix/Linux, the
- Installation directory
- The Genero Studio installation directory on the remote machine; enter the complete path, which will always end with /gst
- User name
- Valid user name. See SSH advanced security.
- User password
- Valid password.
- Select Connect to validate the host configuration.
- (Optional) Use the Terminal command to open a Genero Workplace Window on the remote host or when launching an application in Text User Interface (TUI) mode. For more information, go to Terminal Command.
- Once a valid connection has been made, existing Genero installations, GAS configurations and Environment sets can be imported from the server. Select the Import button. See Import Configuration dialog.
- Define synchronization directories or mount points to shared drives.
- (Optional) When Use synchronization is enabled, select the Limit number of connections checkbox to reduce the number of connections made to the server. This checkbox embeds file synchronization to and from the server in a tunnel. This tunnel is set up before file synchronization starts. Once file synchronization is complete, the tunnel is closed.
-
Select OK. Your new remote host will now be listed in the host list in the lower right
corner of Genero Studio.
Figure: Host list 