This quick start takes you through the steps for creating a
library, where the library code will create the data model in memory and fetch the data one record
at a time, sending it to the Genero Report Engine before fetching the next record. The data is
streamed as it is fetched, and only one record is held in memory at any time. In addition, a Report
Launcher application is generated, allowing you to test your library from within the project. It is
assumed that you will take the generated library and use it in your own bespoke applications.
Create a new .NET project.
Select File > New > C# > BAM C# Project (.4pw).
Enter a name for your project in the Project name field.
This name will become the name of the project workspace file.
Specify the project directory in the Location field.
Click OK.
The project is created and saved in the selected project directory.
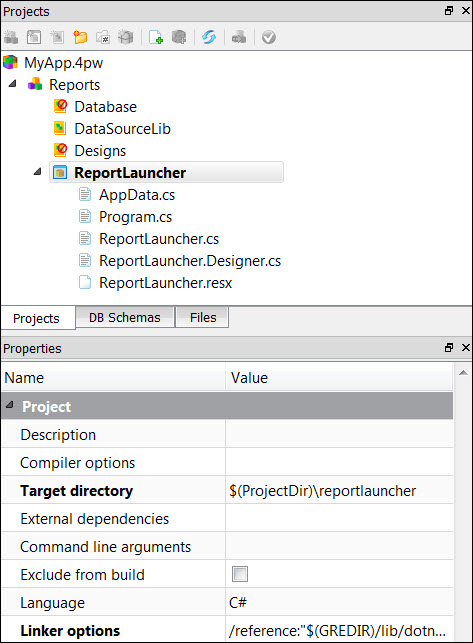
Figure: The C# Project
The project is created, to include nodes for database-related files,
the data source library files, and the report designs. A ReportLauncher application is created as
well, allowing you to test your data source library from within the Genero Studio project.
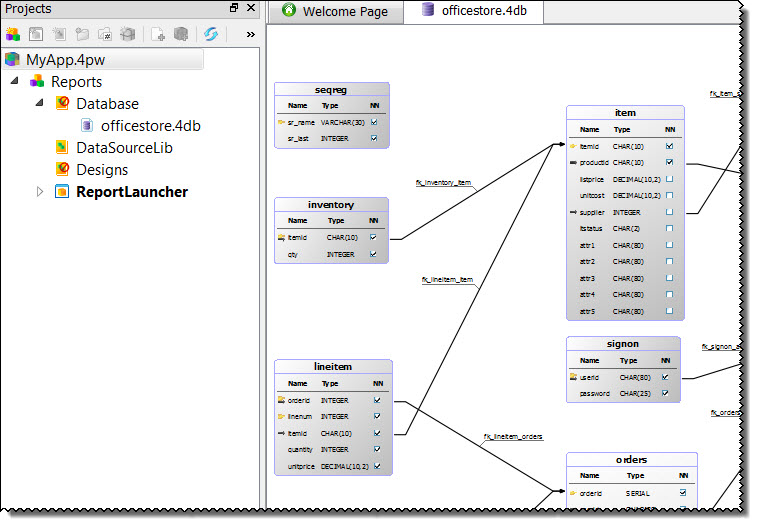
Add your database meta-schema (.4db) file under
the Database node in the project tree, and save your changes.
Right-click on the Database node and select Add
Files.
Select the meta-schema (.4db) file and click
Open.
Figure: Adding the database schema
Configure the database meta-schema.
In most cases, the database meta-schema will have been created with the tables set to Active
and the primary keys defined.
Open the .4db file.
Set the table property for each table you will include to Active.
Tip: To easily set multiple tables as active, hold down the CTRL key as you select the
tables in the Database Structure view, then check the
Active property.
For this quick start, you will select a single table. Most reporting,
however, will involve multiple tables and their relation. See Create a report with BAM for
details on creating more complex data sources.
Select File > New > C# > C# Report Data from Database (.4rdj), and click OK.
In the Column selection page, select columns from a single table to
include in the record.
The record defines the data that will stream, one record at a time, to the report engine.
Click Next > to continue.
In the Query Creation page, one typically sets the
Join, Where and Order by
criteria for the data source. As only a single table was selected, this page can be skipped.
Click Finish.
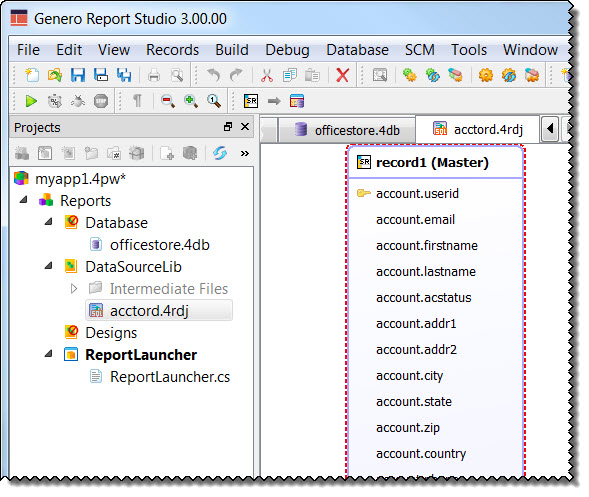
A record is created and displayed in a .4rdj tab.
Select File >> Save as and save the .4rdj file, adding the file to the DataSourceLib
library node.
Important: Check the directory before saving your file! It is recommended that you save
the file in $(ProjectDir)/src.
Selecting the right name in this step is important; the name of the .4rdj
file becomes the name of the C# source, which ultimately becomes the name of the C# class.
Save the changes to your project.
Figure: Project with data model added
Generate the code and the data schema.
Right-click the DataSourceLib library node and select
Build.
The DataSourceLib library node is the node containing the data source
(.4rdj) file.
The report library source and the data schema (.xsd) files are
created and listed in the Intermediate Files folder. The location of these intermediate files is
determined by the setting of the Target directory property.
Create a report design from a template.
For this quick start, we are going to use a template to create a
simple, non-grouped list report. For more information on using report templates, see Create and manage report templates.
Select File >> New, Report from Template.
Select Simple List (PULSE). Click
OK.
In the Schema location field, select the schema created in the previous step.
The rows field populates for you with the record name.
Complete the Repetitions section, mapping the template repetitions to the schema
repetitions. Click Next >.
Add several fields from the Available Fields column to the
Selected Fields column. Click Next
>.
On the Variables page, modify the title placeholder to state
"My Report". Click Finish.
The report is created.
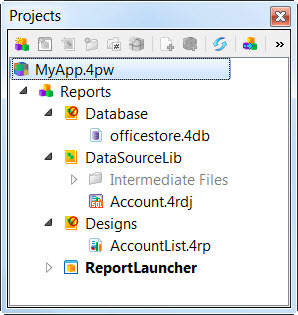
Select File >> Save untitled.4rp as... and save the file in
the $ProjectDir/src directory, and in the
Designs node.
Figure: Report added to project
Right-click on the ReportLauncher node and select
Rebuild.
Run the Report Launcher application.
Right-click the Report Launcher node and select Execute.
In the Assembly field, select the DataSourceLib.dll file to use for this
run of the ReportLauncher application. If your library is not listed, click the
Add button to locate and add your report.
The Assembly field lists your data source library. The Class combobox populates with
possible classes to use.
In the Class field, select the name of the class to use as the data model.
If you have followed these quick start instructions, there will only be a single class to
select from. It is possible, however, to have multiple classes in your library.
In the Report field, select the report to run from the combobox. If your
report is not listed, click the Add button to locate and add your
report.
Click Run.
The report displays. We did not take the time to properly specify all the placeholders,
or to verify the report row lengths, so the report may have some formatting issues, however it
should display and be populated with data.