Column selection

Use the Column selection dialog to choose a database and select fields for the form.

To use Column Selection

  1. Select the database schema from the list of schemas that you have added to your project.
  2. Select a table or view name in the schema list to see its columns in the Column description list. If a schema is not available in the list, add it to the project first.
  3. Expand and/or filter the Tables list.
  4. Select the desired columns and use the right arrows to transfer the columns to the Selected Fields list.
  5. Use the up/down arrows to rearrange the column order. Use the left arrows to remove columns from the Selected Fields list.
  6. Click Next to continue to the Container Selection page.
    Figure: Data Control Wizard
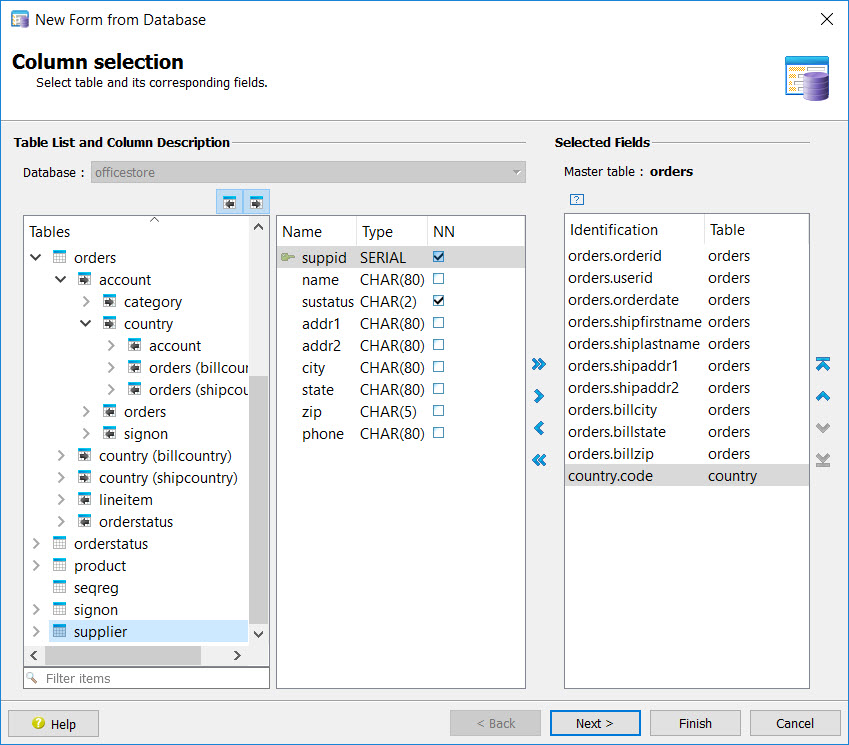
    This figure is a screenshot of the Column selection panel of the Data Control Wizard.
    Database
    Available schemas.
    Tables
    Tables are listed in alphabetical order.
    Tables that have defined relationships in the schema can be expanded to show the tables to which they relate and how they relate. The Incoming arrow and Outgoing arrow buttons at the top of the Tables list filter the list to show the outgoing and incoming relationships:
    • Incoming - Identifies those tables that have a relationship with the selected table where the selected table includes the foreign key(s).
    • Outgoing - The default filter. Identifies those tables include a foreign key relationship to the selected master table.
    The joins are automatically built based on the schema relationships and can be viewed or modified in the Joins and Data order page of the wizard.
    The Filter items field (located at the bottom of the Tables list) allows you to filter by table or category names.
    Master table
    Identifies the master table for the selected fields.