Explore Source Code Management

Maintain and share project files with Genero Source Code Management (SCM)

Before you begin, a Subversion client must be installed on your local machine as described in Subversion plugin overview. In addition, you must have access to a Subversion repository containing the OfficeStore sample to perform the steps below.
The steps in this tour assume that the files for the OfficeStore sample project have been stored in an SVN Repository.
  1. Use the Checkout option from the SCM menu to checkout the OfficeStore project files from the repository to your checkout directory.
    The SCM Checkout wizard steps you through the process of checking out project files and prompts you to select a project file (4pw) to open in Project Manager.
    Figure: The SCM Checkout wizard
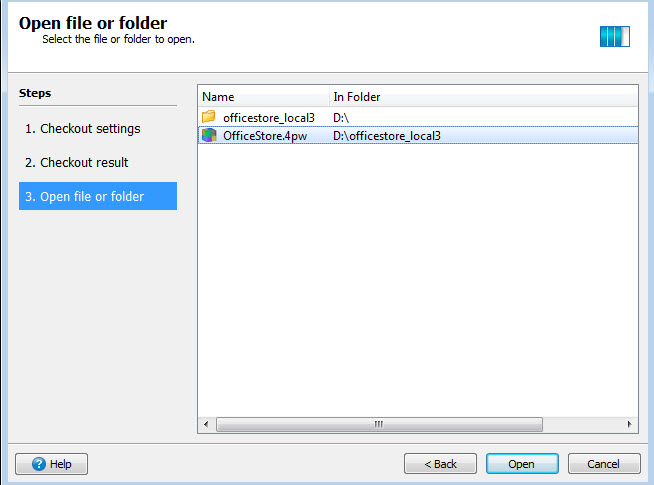
    This figure shows how to select a project file to open in Project Manager after completing the checkout dialogs in the SCM Checkout wizard.
  2. Select File > New > Genero Files > Style (.4st), and save the new styles file as account.4st in the Entities node.
    Adding a file to the project automatically performs an SVN add, which uploads and adds the file to the repository on your next SVN commit. The Entities folder displays a red exclamation mark to indicate uncommitted changes to the directory.
    Figure: Adding a file to a project managed by SCM
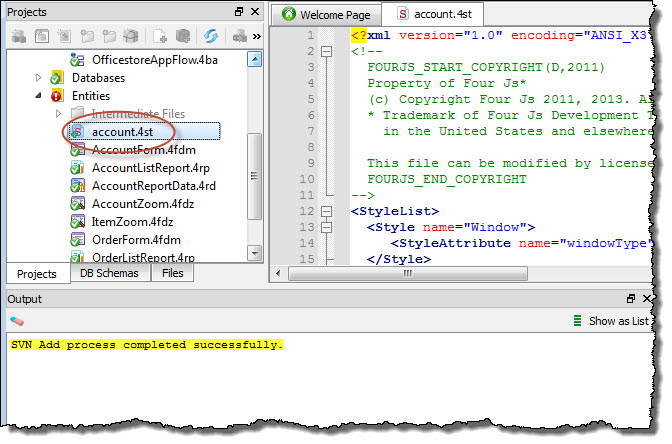
    This figure shows the automatic SVN add process when a new file is added to an SCM-managed project.
  3. Select Window > Views > SVN Status, navigate to your checkout directory and select Add mode.
    Selecting Add mode lists the newly added styles file as well as any other unversioned files present in the directory.
    Figure: The SVN Status view

    This figure shows a new file displayed by the Add Mode option in the SVN Status view.

  1. Ensure the Select option is checked and select the Commit... button at the top of the view to invoke the SVN Commit dialog.
  2. Enter New styles file in the Commit Comments area and select the Commit button to commit the new file to the repository.
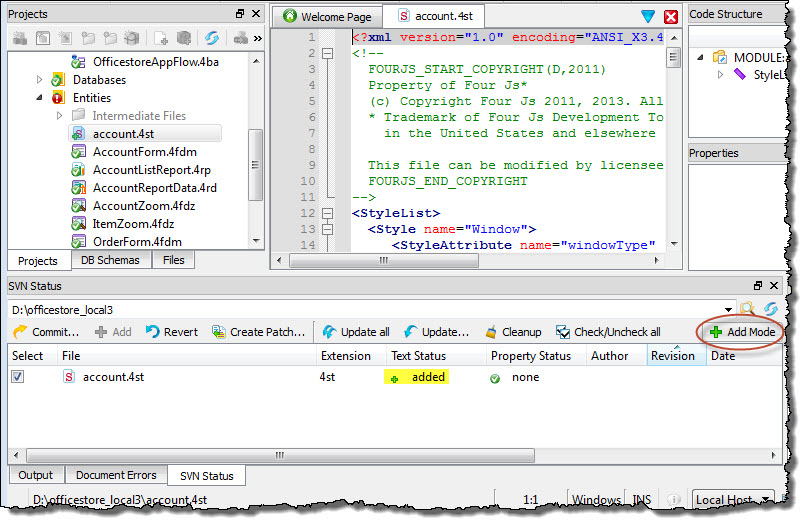
  3. Enable the SVN needs-lock property on the account.4st file to prevent commit conflicts.
    Setting the needs-lock property requires a user to lock the file before modifying it.
    1. Right-click on the account.4st file in the Projects view and select SCM > Properties.
    2. Select the + at the top of the Property view to launch the Add SVN Property dialog.
    3. Select svn:needs-lock from the selection list, select OK and close the SVN Properties dialog.
    Figure: Setting the needs-lock property

    This figure shows the needs-lock property that requires a user to lock a file before modifying it.
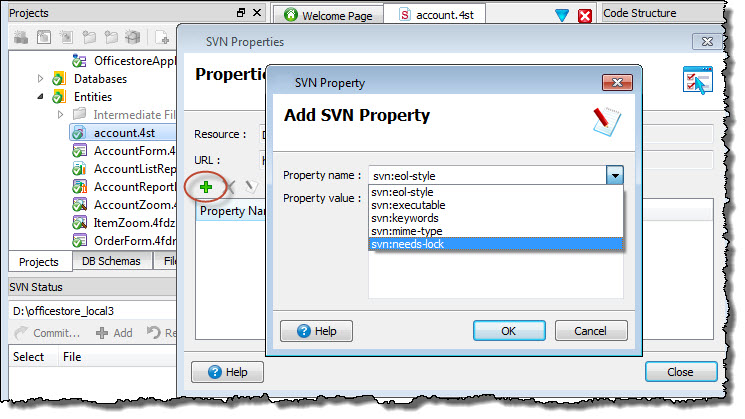
  4. Lock and edit the account.4st file.
    1. In Project Manager, right-click on the account.4st file and select SCM > lock.
    2. Enter testing locks in the Lock files comment area and select Lock.
    3. Select the SVN Locks button in the SVN view at the bottom of the screen to view information about all locked files in the checkout directory.
    4. Open the account.4st file in Code Editor, delete lines two through nine and save the changes.
      Deleting the lines will create many errors as indicated by the red icons in the Code Editor gutter.
    Figure: The SVN Locks view

    This figure shows the locked account.4st file in the SVN Locks view.
  5. Select the account.4st file in the SVN Status view and commit the changes (use style edits for the Commit Comment).
    Note that committing the file releases the lock. You may be prompted to reload the modified file when you commit. Respond by selecting Reload.
  6. Right-click the account.4st file in the Project view and select SCM > Show Log to add and open the SVN Log view at the bottom of the screen.
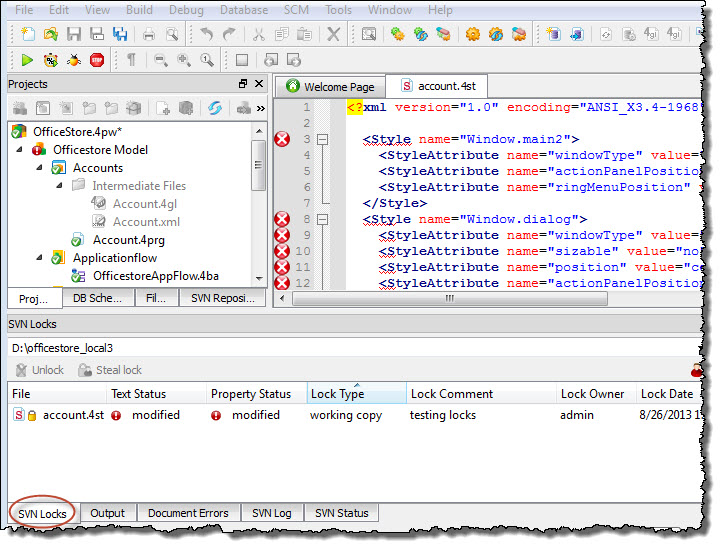
  7. Right-click on the entry for Revision 4 in the SVN Log and select Diff to call the Diff utility to compare the selected revision with the previous revision.
    You can also use ctrl-click to select specific revisions you wish to compare with the Diff utility.
    Figure: Performing a Diff

    This figure shows the option to open the Diff utility to compare the selected revision with the previous revision.
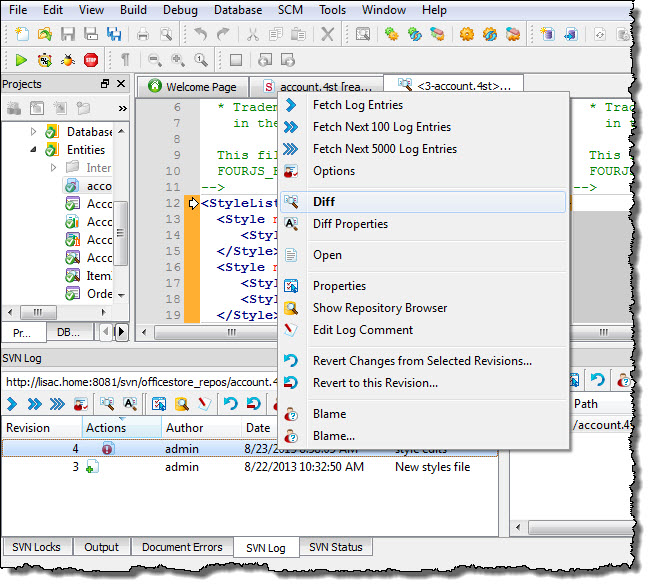
  8. Right-click on the entry for Revision 4 in the SVN Log view and select Blame to see inline annotations for each change, including the author and revision number.
    Figure: The Blame view

    This figure shows the Blame view, with inline annotations showing the author and revision for the last change of each line in the file.
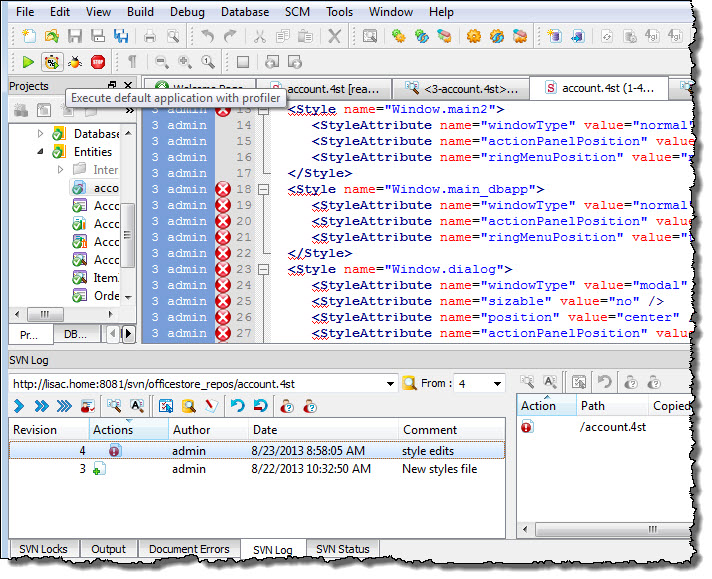
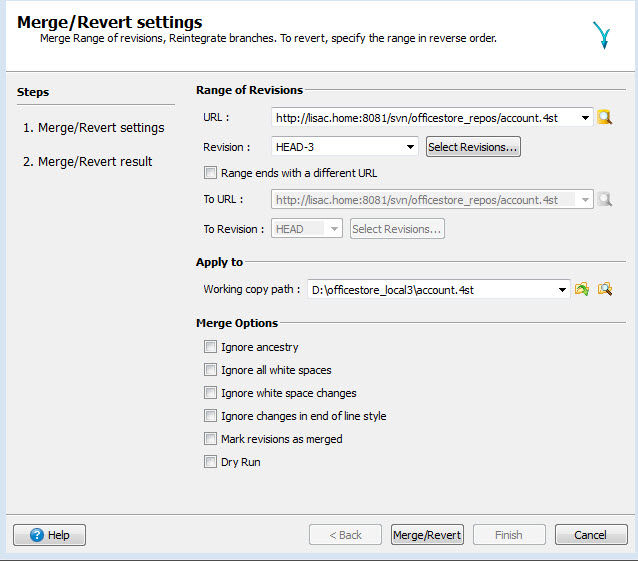
  9. Revert back to an error-free version of the account.4st file.
    1. Right-click on the entry for Revision 3 and select Revert to this Revision... to launch the SVN Merge/Revert dialog.
    2. Accept the defaults in the SVN Merge/Revert dialog and select Merge/Revert, then Finish in the Merge/Revert result window.
      The account.4st file reverts back to the selected revision and displays in Code Editor with the deleted lines from Revision 4 replaced and highlighted.
    Figure: Reverting to a previous revision

    This figure shows the SVN Merge/Revert dialog, used to revert a file to a previous revision.
  10. Delete the account.4st file to complete the tour.
    1. Close the account.4st file in the Code Editor view.
    2. Right-click the account.4st file in Project Manager and select Delete from Disk.
    3. Select the account.4st file in the SVN Status view and select Commit... (enter SVN test for the Commit Comment).