Extract meta-schema information from database
The New Meta-schema dialog assists in extracting schema information from a database.
To extract a database meta-schema file from a database, you must have access and permissions for the database. If you have trouble connecting to a database, make sure the database and the corresponding database client software are installed and configured properly.
When you extract the meta-schema information from the database, you overwrite the existing schema. Any user changes that had been made to the schema are lost when using the extract schema option. If you wish to keep user changes, you must update the schema. See Update a meta-schema from database.
-
Select Database>>Extract Schema. The first step is specifying the name and
location of the meta-schema file.
Figure: New Schema dialog 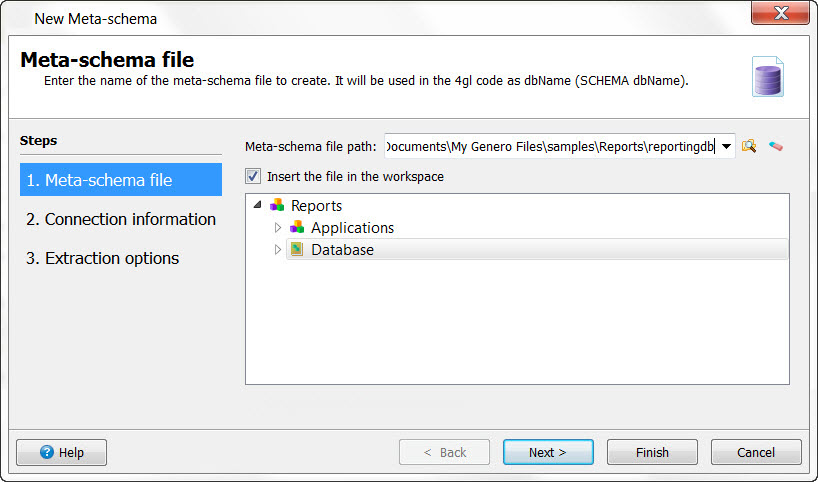
- Meta-schema file path
- Enter the name and path for the new database meta-schema file. Specify a .4db file extension for standard projects, or a .4dbx file extension if you are working with a Business Application Modeling managed project.
- Insert the file in the project
- Check this box to add the meta-schema file in the project. Select the node where the file should be added.
-
Click the Next button to continue to Connection
information. This connection information is only used to extract the information for the
database meta-schema file from the referenced database.
Figure: Connection information 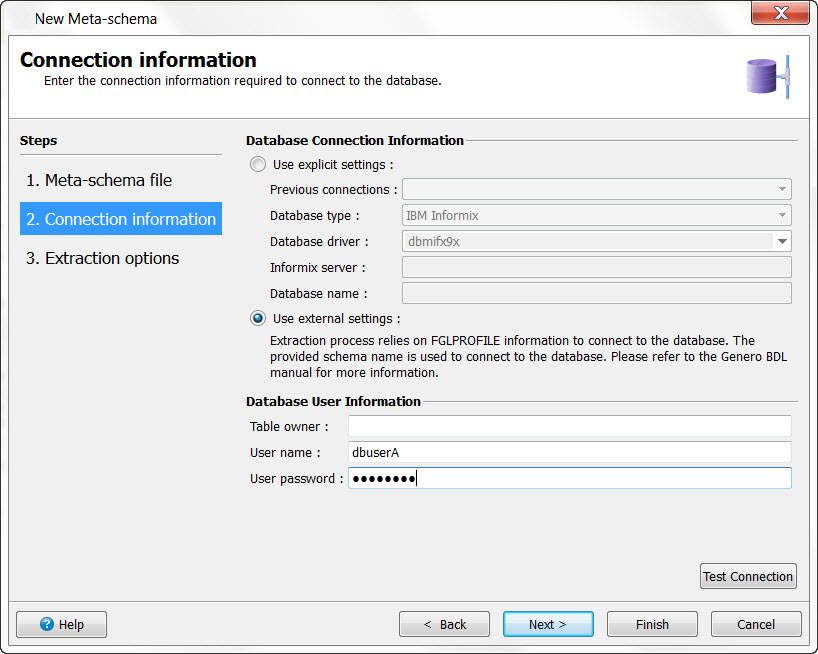
-
Click the Next button to continue to Extraction Options. Select
the options for the meta-schema file.
Figure: Extraction options 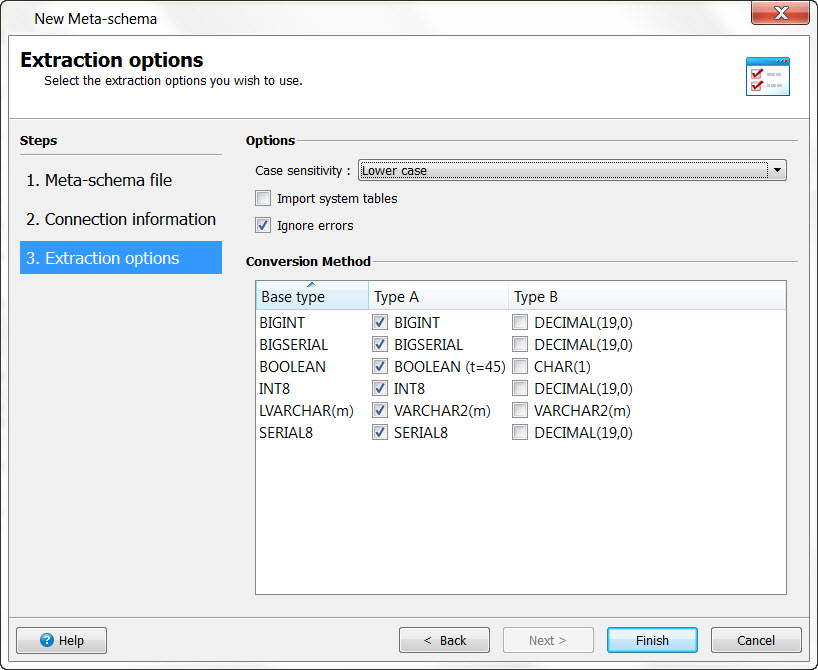
- Case sensitivity
- Specify how case in database object names should be handled.Case sensitive: case won't be changed on database objects, Lower case: database object names will be converted to lower case, Upper case : database object names will be converted to upper case.
- Import system tables
- Check this box to include system tables in the schema.
- Ignore errors
- Specify that conversion errors should be ignored. If this option is unchecked, the extraction will stop as soon as an error occurs (for example, if a table column has an unsupported type.)
- Conversion method
- Select the type of conversion you wish for the specific data types; the default choice is Type A.