Configure for the Desktop client
GDC configurations contain information about the available Genero Desktop Clients (GDC).
Select which GDC to use
In the Display section of the Genero Configuration Management dialog, select the Use Display Client radio button. In the combobox provided, select the GDC configuration to use. To add a new GDC configuration, click the Edit icon next to the Display Client configuration combobox. The Display Client management dialog opens.
Create or edit a GDC configuration
To add a new GDC configuration, click the Edit icon next to the Display Client configuration combobox. The Display Client management dialog opens. Select GDC from the Client type combobox.
Figure: Display Client Management dialog
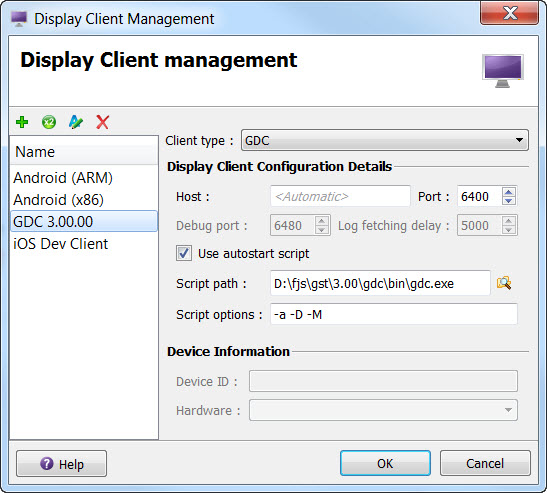
Select a configuration from the list to modify its settings. Use the integrated Toolbar to add, duplicate, remove, or edit a configuration. Once a name is added, enter its settings.
The following fields apply to a GDC configuration:
- Host
- Hostname or IP address where the GDC client executes. In local host mode, when the host field is empty, the client IP address will be automatically detected in order that GDC will always be accessible from fglrun. You can change this manually.
- Port
- Port from which GDC client is to be launched.
- Use autostart script
- Check this option to have Genero Studio automatically start the GDC.
- Script path
- Path to where GDC client is installed.
- Script options
- Command line options for the execution of Genero Desktop Client (GDC). For a full list of valid command line options, see the Genero Desktop Client User Guide.