ssh-agent
First, you have to generate a private\public key pair. If you already have a PuTTY generated key pair, see the How to use PuTTY keys with ssh-agent section; otherwise, we will generate it with ssh-keygen.
- Type ssh-keygen -t rsa in a terminal to generate a key pair using rsa encoding.
- You will be prompted for the file path where you want to save your private key. If you press enter without giving a path, the key will be saved as ~/.ssh/id_rsa.
- Next, enter the pass phrase (needed to decrypt the private key). Don't forget it as you will have to enter it again at each logon session. The public key file will be saved with the same path as the private key file, but with the .pub extension.
- Go to your home directory ( /home/username ) on your host machine, and edit the .ssh/authorized_key s file with your preferred text editor. If the file (or .ssh directory) doesn't exist, create it.
- Copy your generated public key in authorized_keys file. The key must be exactly in the same format as displayed in PuTTYgen (ssh-rsa ****...****== keyname) and must occupy just one line. If several lines were already present, enter a line return before writing the key.
Next, configure ssh-agent to automatically provide signatures from the private key.
- ssh-agent must be started at each logon session. Execute it if it isn't already running.
- Next, execute ssh-add with the private key file path as the parameter (For example ssh-add ~/.ssh/id_rsa ). This will tell ssh-agent to test your private key each time you start an ssh session.
- Verify that the key has been successfully added by typing ssh-add -l. It should display you your private key fingerprint.
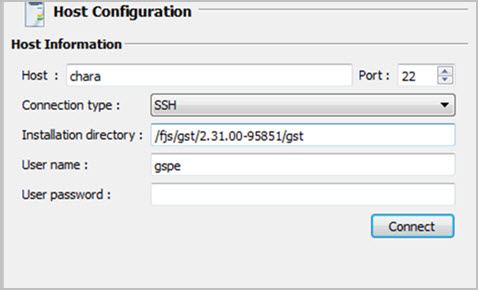
You can now use public key authentication with Genero Studio. For that, create an SSH connection without entering a password:
Figure: Host Configuration