Import Project dialog
Use the Import Project dialog to specify preferences when importing files from a file system into a project.
Figure: Import Project dialog
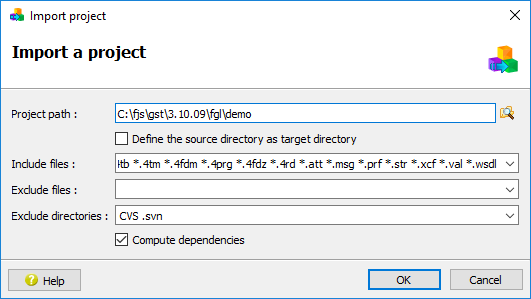
- Project path
- Enter the path and name of the directory to be imported, or use the browse button to select it from the file system.
- Include files
- A complete list of the files that will be imported (for example, *.4gl indicates all files with the extension 4gl). By default, files having the Genero and Genero Studio file extensions are listed; modify this list by adding or removing entries. The entries in the lists are separated by spaces.
- Define the source directory as target directory
- If checked, The Target directory property is set to the relative path
from
$(ProjectDir)to the source directory. - Exclude files
- Enter the files that are to be excluded from the project. Use the * symbol to indicate all files; for example, *.abc would exclude all files having the extension abc. The entries are separated by spaces.
- Exclude directories
- A list of excluded directories. By default the CVS directory is excluded. The entries are separated by spaces.
- Compute dependencies
- If checked, Project Manager will try to compute the dependencies between Application/Libraries when importing the project.
Example
In this example, all files with a 4gl extension in the specified path will be included, except for testform.4gl . The directories CVS and mydir will also be excluded.
Figure: Import Project example

Default organization of imported files
When files are imported into Project Manager, a new Group node is created
and listed in the Projects view. For each folder, the process is:
- A File node is created for each file.
- The file nodes are then added to a Library; the name of the folder is used as the name of the Library node.
- If a file contains a MAIN program block, an Application node is created and the File node is added.
- A Group node is then created, and all Library and Application nodes, and their nodes, are added to this Group.