Create a new database for your project.
There is a 4dbx file already in the project in the Database node. The 4dbx contains the information about the tables, columns, and relations of the relational database that is needed by your app.
-
Right-click and select Add Table. Set the table's name
property to account. Right-click on the table to add the columns as shown.
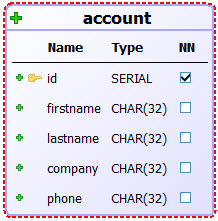
Figure 1. Create table
-
Make the id column SERIAL and not
null. Make the id column the primary key for the table. With the table
selected, right-click to see the menu option for adding a constraint.
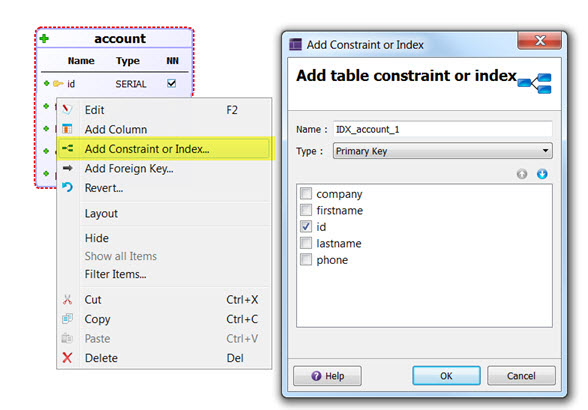
Figure 2. Set primary key
-
Right-click on the 4dbx file in your project and select . Select the option to populate database with sample data and then
Generate.
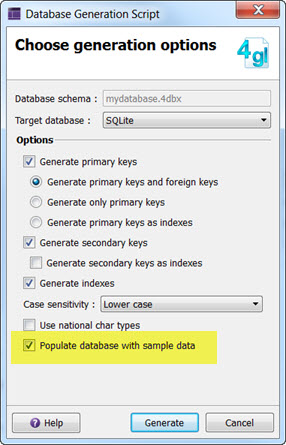
Figure 3. Generate Database Creation Script
-
Save the file to the databaseMaintenance sub directory in your project
directory to overwrite the default file with your file.
- Uncheck the Insert the file in the project option as the file is already in the project; you are just saving the file to disk.
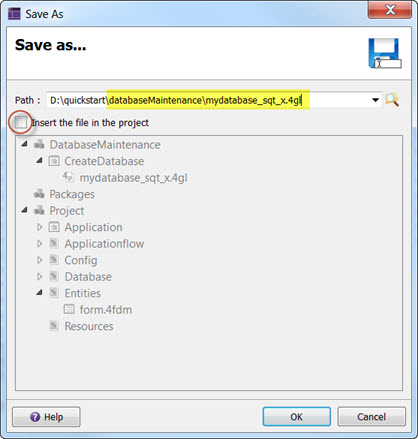
Figure 4. Save to databaseMaintenance sub directory