Follow these steps to explore the visual tools for user interface development.
Explore a form, then create a new form
- Expand the OfficeStore project and find the Entities node.
-
Expand the Entities node and double-click on the
OrderForm.4fdm file.
The OrderForm.4fdm file is a form and opens in the Form Designer.
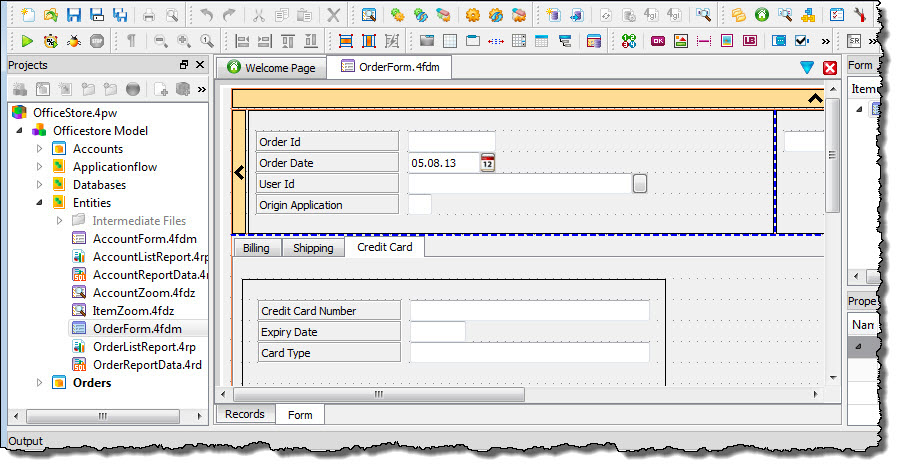
Figure 1. The OrderForm.4fdm file
- Customize your working environment to best suit you. All panels can be re-sized with the mouse or closed and reopened with Window >> Views. Try pressing Alt-F11 to toggle to Document editing. Select Alt-F11 again to return to normal view. Double-click on the title of the Form Structure view to undock it. Double-click again to re-dock it into its last position.
-
Scroll down in the Form Structure view to the Form section and select a form item.
The item is also selected in the form design.
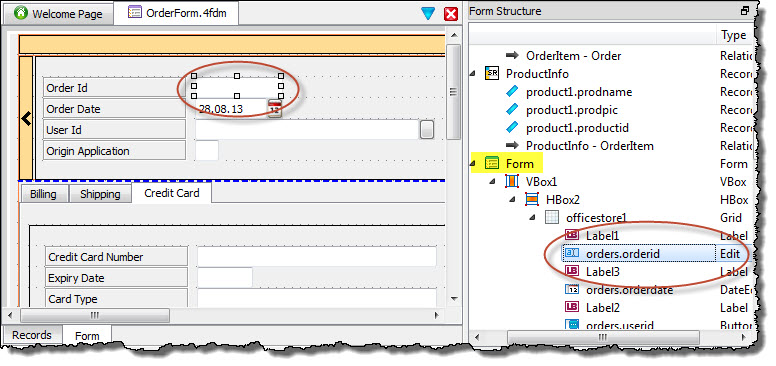
Figure 2. Selecting a form item in the Form Structure view
-
Use the Form from Database wizard to create a new form:
-
Select File >> New >> Genero Files, Form from Database (.4fd).
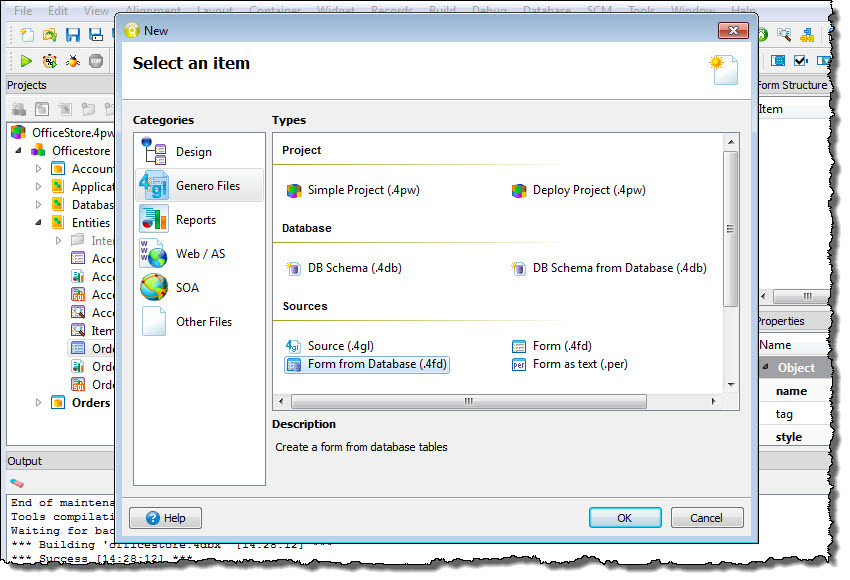
Figure 3. Creating a new form
-
Select the officestore database and the account
table (use the double arrow to select all columns in the account table for the form).
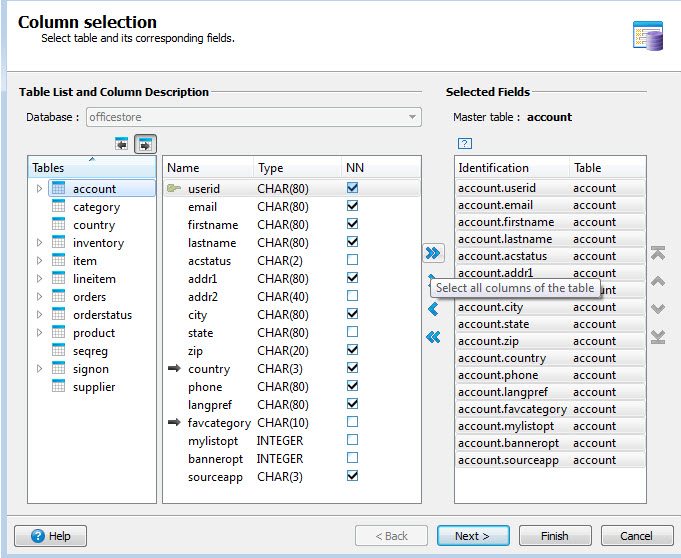
Figure 4. Selecting database and columns for a new form
-
Select Finish.
The form is now ready to use or modify in Form Designer. Additional table columns, container,
and widgets can be added.
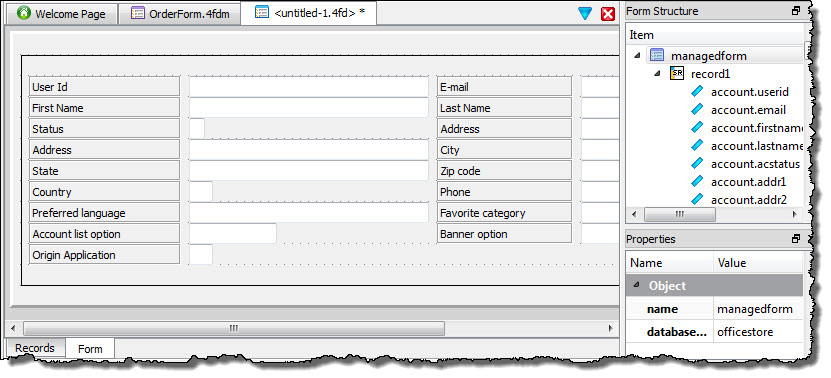
Figure 5. Form created from the Form from Database wizard
-
Select File >> New >> Genero Files, Form from Database (.4fd).
- Select the Records tab at the bottom of the window. The Records tab represents the data set for your form. Additional records can be added here or in the design.
-
Right-click on the record and select Add Field.
A field is added to the record with default values.
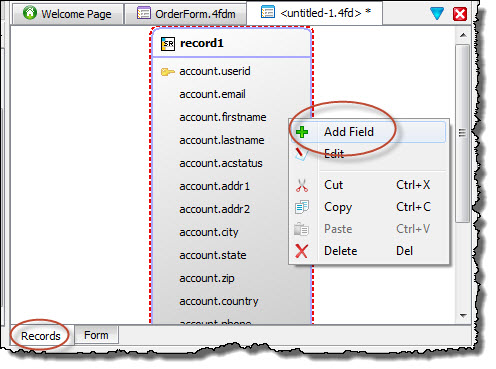
Figure 6. Adding a new field to a form record
- Switch to the Form tab. Note that the new field has been placed on the form in the top left. This field's properties and placement can be modified.
-
Right-click on the new field and select Convert Widget >> FFLabel to change the field to a form field label.
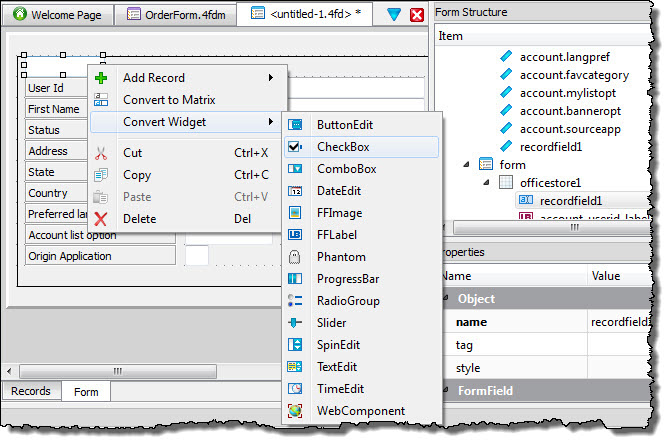
Figure 7. The Convert Widget menu
-
In the properties for the new field, change its color value from Black to Blue.
The color changes on the form design.
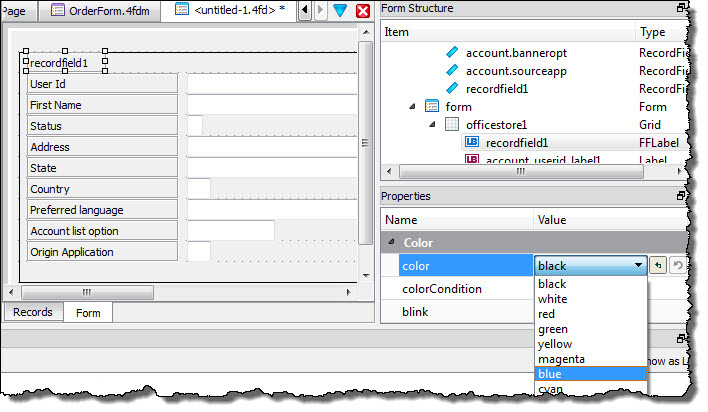
Figure 8. The color property
- Select Build >> Preview to get an idea about how the form will render in the Desktop client.
- Close the form preview and the untitled form (do not save it) to complete the tour.