Follow this procedure to install and configure the Java SDK and Android SDK. Once
configured, the menus are enabled in Genero Studio.
Before you begin:
- If a proxy is needed on your network, it must be defined in .
You must configure for the Java and Android SDKs.
-
Install the Java Standard Edition Software Development Kit to a location of your choice: http://www.oracle.com/technetwork/java/javase/downloads/index.html. Make a
note of the installation path.
Note:
- Genero Mobile requires Java SE Development Kit 7 (JDK 7) as a minimum.
- Choose the Java package (32 bit or 64 bit) that matches your Genero installation (32 bit or 64
bit).
-
Launch Genero Studio.
-
Select to open the Genero Configuration Management window.
-
Set the JDK_HOME variable to the location of the Java SDK you installed, for
example C:\Program Files\Java\jdk1.7.0. To edit the JDK_HOME
environment variable, highlight the Java SDK environment set and double-click
on the JDK_HOME environment variable listed.
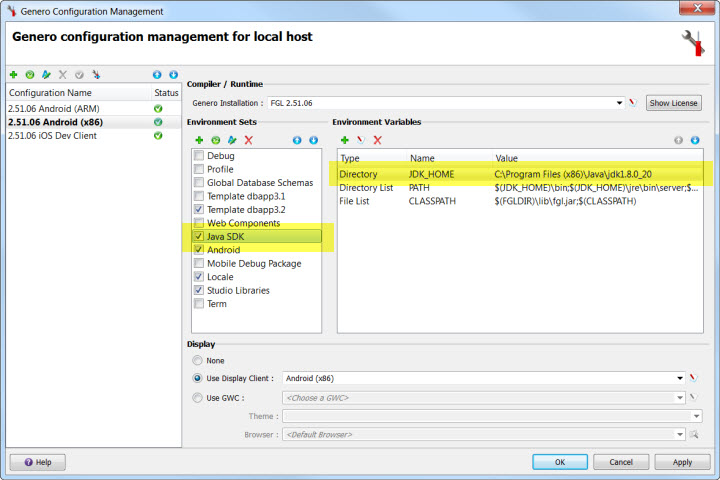
Figure 1. Set Java environment
-
Download the Android Software Development Kit (SDK).
-
Go to https://developer.android.com/studio/index.html
-
Find the Get just the command line tools section.
-
Download the installer for your operating system.
-
Install the Android SDK to a location of your choice. Do not install in the Program Files
directory.
Note: If you install Android SDK in the Program Files directory, Genero Mobile must be run as
administrator to auto-configure Android SDK.
Note your installation path. If the Android SDK Manager launches, close it.
-
Set the ANDROID_HOME variable to the location of the Android SDK you
installed, for example C:\Android\android-sdk. To edit the
ANDROID_HOME environment variable, highlight the Android
environment set and double-click on the ANDROID_HOME environment variable in the
list.
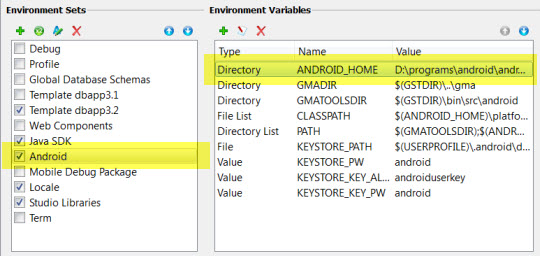
Figure 2. Set ANDROID_HOME in Android environment
-
Right-click on your preferred Android configuration in the Configuration
Name list and select Set Genero Configuration Active.
-
Select OK to save the changes.
-
Select . The updates will occur in a separate console window. Accept the license agreements
as prompted.
Note: This step can take several minutes.
-
You are now ready to setup your Android physical or virtual device. See Display to an Android physical device or Display to an Android virtual device.
You need an internet connection for the first
time you build an Android package. During this first build, an automated process will download and
install Gradle with all necessary extensions into a directory in your user directory. Gradle is a
project automation tool, find out more about Gradle at http://www.gradle.org.