For a report application that prints out labels, the report design document (.4rp) is the size of a single label.
A report program programmed to output labels expects the report design document to
represent a single label.
- To code a Genero report application that creates labels in a report format, see Create labels: the report program (Genero BDL).
-
In the custom page you've created, design the label as you would design any report, to include
adding fields from the Data view.
In this example, the page has a width of 9.90 cm and a height of 4.30 cm. The page contains
six WordBox objects. Each WordBox object is populated with data from fields listed in the Data
View.
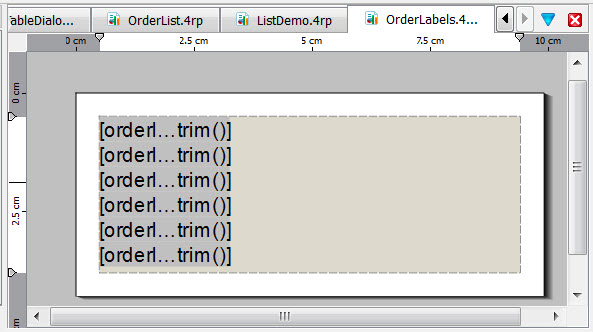
Figure 1. Label Report and Report Structure
-
In the Report Structure, place the report under the appropriate
trigger.
In this example, the label (Page) is positioned under the
orderid trigger, meaning a new label is printed each time there is a change
in orderid.
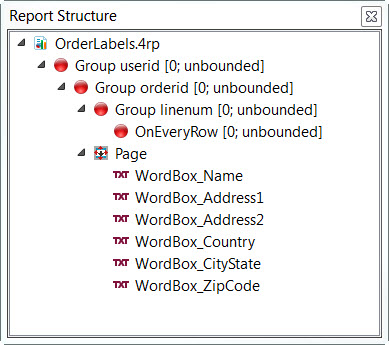
Figure 2. Label Report and Report Structure
For an example, see the orderlabels.4rp report in
the OrderReport demo application.