Select and confirm that the Template dbapp 3.0 or the template of
your choice is selected in the Environment Sets list. This will be the code generation template used
for the project.
-
Select to create a project for your generated application. When you create a managed project, nodes for the basic structure of
the project are already defined and automatically contain the additional build rules needed for
generated programs.
The project structure has pre-defined nodes to contain the files for your project:
- Application_1 - for the program and form files, and any additional source code files
- Databases - for the Genero database schema files (4dbx)
- Library_1 - for any additional resource files
-
Right-click on the Application node and select Advanced Properties from
the menu. Note that the dependencies for the Databases and Library nodes have already been set,
ensuring that any files they contain will be included in your application.
-
In the Advanced Properties dialog, select Environment
Variables and add a User variable FGLPROFILE by clicking on the green
cross. The fglprofile file contains the configuration information to access the
sample databases. This file is located in theMy Genero Files/samples/DSConfig
directory.
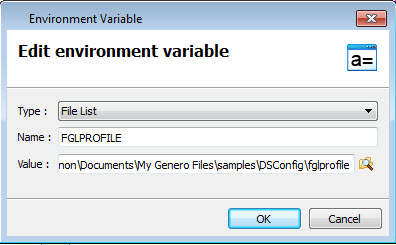
Figure 1. Edit environment variable dialog
-
Save the project (4pw) to a folder in your file system.