Genero Identity Platform StarterApp reference
The StarterApp configures the Genero Identity Platform (GIP) running on a Genero Application Server (GAS).
Before you can use the GIP, you must configure the GIP. The StarterApp configures the GIP. You run the application one time to configure the GIP.
If you are setting up the GIP for the first time, follow the instructions here: Setting up the Genero Identity Provider.
If your architecture involves multiple GAS servers, you initially set up the GIP on one GAS. After the initial configuration, you then configure the other GAS servers to link to that initial setup. Find the instructions for configuring those GAS servers here: Configure for an external GIP.
The remainder of this topic serves as a complete reference to the StarterApp. Its purpose is to provide you with the detail behind each decision you are asked to make while using the StarterApp.
Starting the StarterApp
http[s]://host:port[/gas]/ua/r/idp/StarterApp[/gas] element of the URL indicates that it is optional. In development, you may be
using the httpdispatch standalone dispatcher. For the standalone dispatcher, the StarterApp URL
is:http://host:port/ua/r/idp/StarterAppCompleting the StarterApp forms
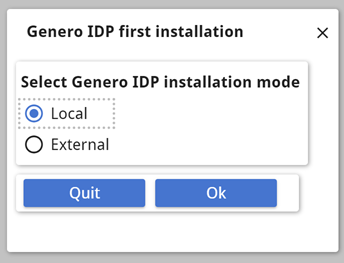
- The Genero IDP first installation form. See Table 1.
- The Genero Identity Provider Installation form is based on the installation mode selected.
| Configuration option | Instruction |
|---|---|
 |
|
| Configuration option | Instruction |
|---|---|
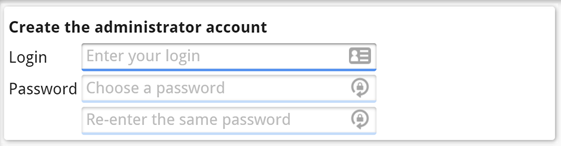 |
Create the GIP administrator account. This account has access to GIP components, such as the ConsoleApp and DeploymentApp. |
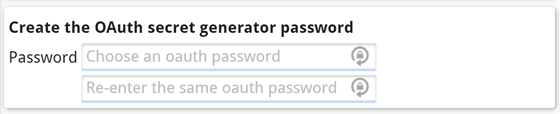 |
The GIP uses the OAuth password when generating OAuth secret IDs. For example, when deploying and securing applications, the GIP uses this
password to compute the |
 |
The Base URL is the base URL for the Genero Application Server. The StarterApp computes the default URL from the address of the GAS running the StarterApp. If the GAS is configured with a Web server in HTTPS, the base URL will use the HTTPS protocol. HTTPS is preferred for GIP. You can typically accept the default URL. Edit this setting if you intend the GIP to use a different GAS. |
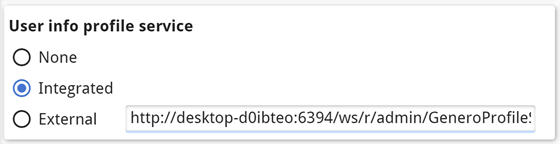 |
The profile service is a component of GIP that
maintains user data such as name, date of birth, email address, etc., for registered users on the
GIP:
|
 |
|
| Configuration option | Instruction |
|---|---|
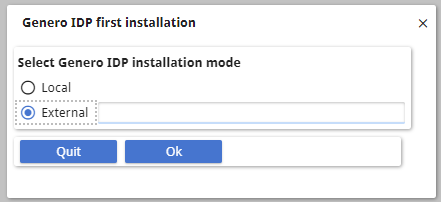 |
When you select the External radio button, an Edit field appears. Enter the URL of the Genero Identity Provider (which has been installed on a separate GAS): http[s]://host:port/[gas/]ws/r/services/GeneroIdentityProvider When you click Ok, a second form opens. |
 |
For the GAS base URL, enter the URL of the GAS you are currently configuring. Typically, you can accept the default base URL as the StarterApp automatically computes this from the address of the GAS you run the app from. If the GAS is configured with a Web server in HTTPS, the base URL will use the HTTPS protocol. HTTPS is preferred for GIP. |
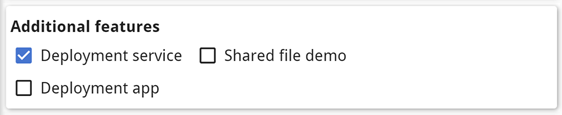 |
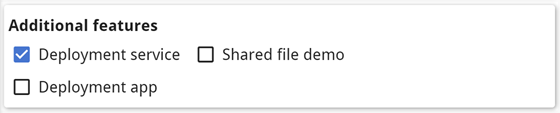
Under Additional features, select the services and apps you want to
install on this local GAS. They will be protected by the external GIP specified in the first
step.
|