These are the instructions for the manual configuration of the ISAPI dispatcher for IIS 7.0.
Prerequisites
The installer needs some IIS features to be activated:
- IIS Management Scripts and Tools
- ASP.NET
- .NET Extensibility
- ISAPI Extensions
- ISAPI Filters
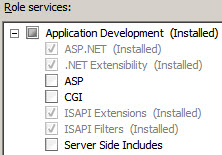
To activate "IIS Management Scripts and Tools" on a Windows® Server 2008:
- Click on Start -> Control Panel -> Administrative Tools -> Server Manager -> Roles -> Web Server (IIS)
- Right Click -> Add Role Services
- Select "Management Tools"
- Check "IIS Management Scripts and Tools"
- Click the "Install" Button
Do the same for the other features.
Example:
Figure 1. Role services dialog
To activate IIS Management Scripts and Tools on Windows 7
To activate IIS Management Scripts and Tools on Windows 7 and validate the basic IIS configuration requirements:
- Verify IIS is installed. In Control Panel > Administrative Tools, you must
have an entry called Internet Information Services (IIS) Manager.
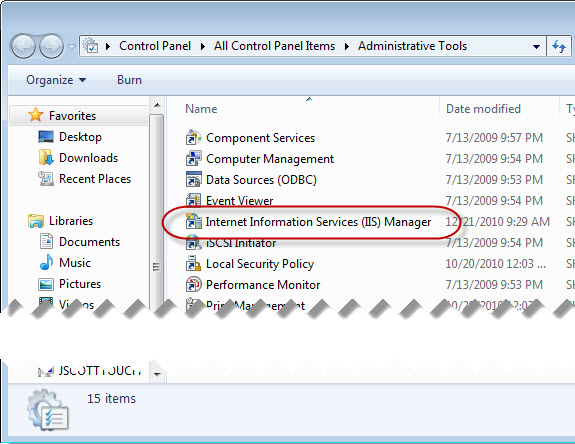
Figure 2. Control Panel with IIS Manager highlighted
- Verify IIS is well-started. Open a browser and enter the URL:
http://localhost. The IIS welcome screen displays.
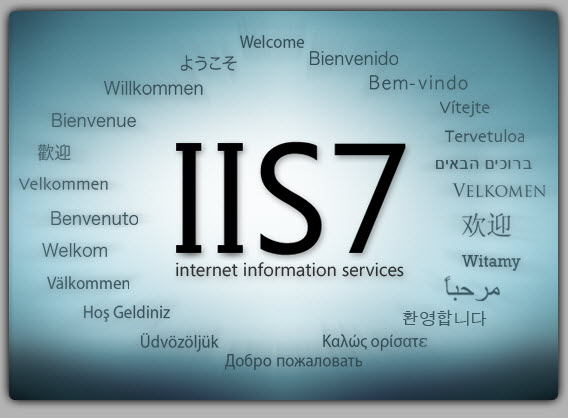
Figure 3. IIS Welcome Screen
- Set the appropriate Windows Features. Go to
Control Panel >> Programs and Features. Click Turn Windows features on or off.
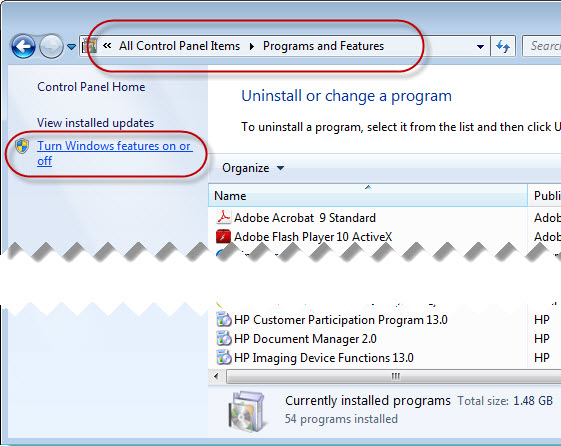
Figure 4. Turn Windows features on or off link
- In the Windows Features dialog, select
IIS Management Scripts and Tools, and verify that the ASP and the ISAPI options are
also selected. When checking these options, other options may also be automatically checked.
That is normal behavior, as they are combined options.
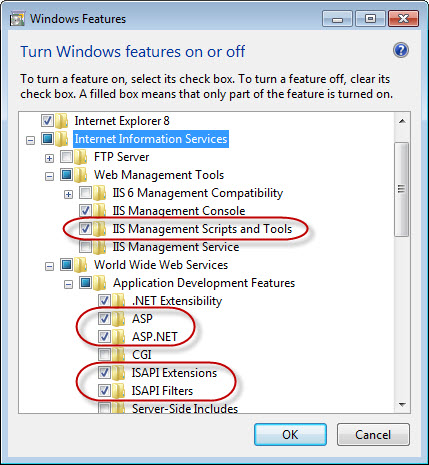
Figure 5. Turn Windows features on or off dialog
Configuring IIS 7.x application pools
The application pool should be configured according to the kind of application the GAS ISAPI Extension will run. If the GAS ISAPI Extension runs only Web service applications, it is fully compatible with application pool parameters. If it runs Web or Desktop applications, IIS should drive all requests to the same worker process; therefore, a dedicated application pool should be created.
To create an application pool:
- In IIS manager, right-click Application Pools and click Add Application Pool....
- In the Add Application Pool dialog, enter a name for the application pool, for example "GASAppPool".
- In the .NET Framework version box, select No Managed Code.
- In the Managed pipeline mode box, select Classic.
- Click OK.
To configure the application pool to run Web and Desktop applications:
- In IIS Manager, right-click the application pool, and click Advanced Settings...
- In the Advanced Settings dialog, in the Process Model area, set the Idle Time-out (minutes) field to "0" or to a value that is greater than the USER_AGENT timeout value of 4GL applications that the application pool will run.
- In the Process Model area, set the Maximum Worker Processes field to 1.
- In the Recycling area, set the Disable Overlapped Recycle flag to True.
- In the Recycling area, set the Disable Recycling for Configuration Changes flag to True.
- Click OK.
The GAS ISAPI Extension will be executed on behalf of the user that is registered in the pool's properties. That user must have access to the FGLASDIR directory. To change the user identity that runs the GAS:
- In IIS Manager, right-click the application pool, and click Advanced Settings...
- In the Advanced Settings dialog, in the Process Model area, click the Identity field.
- Click ... to open the Application Pool Identity dialog.
- According to your security policy, either select a built-in account or set a custom account.
- Click OK.
- In the Advanced Settings dialog, click OK.
Configuring an IIS 7.x application
To create an application:
- Create a directory on the disk that will be the application root for the application, the directory is for example FGLASDIR/ISAPI.
- In IIS Manager, right-click the web site on which you want to add the application, for example "Default Web Site", and then click Add Application...
- In the Add Application dialog, enter the alias of the application, for example "gas". This name will be the virtual directory part of the URLs accessing the GAS.
- Enter the physical path to the directory created in step 1.
- Click Select...
- In the Select Application Pool dialog, select the application pool that has been defined previously.
- Click OK.
- In the Add Application dialog, click OK.
The authentication configuration depends on your security policy. If all users have access to the application, the identity of the anonymous user should be configured as following:
- In IIS Manager, click the application on which you want to configure the identity of the anonymous user.
- In the Features View panel, double-click the Authentication icon.
- In the Authentication feature, select the Anonymous Authentication line.
- Ensure that the status is Enabled.
- In the Actions area, click Edit...
- In the Edit Anonymous Authentication Credentials dialog, select Application pool identity.
- Click OK.
To bind the application to the GAS ISAPI Extension:
- In IIS Manager, click the application on which you want to bind the application to the GAS ISAPI Extension.
- In the Features View panel, double-click the Handler Mappings icon.
- In the Handler Mappings feature, in the Actions area, click Add Wildcard Script Map...
- In the Add Wildcard Script Map dialog, enter the path to the GAS ISAPI Extension DLL: FGLASDIR\bin\isapidispatch.dll.
- Enter a name for this mapping, for example "GAS ISAPI Extension".
- Click OK.
- To the question Do you want to allow this ISAPI extension?, click Yes.
- In the Handler Mappings feature, in the Actions area, click View Ordered List...
- Ensure that the GAS ISAPI Extension is at the top of the list.
- Click View Unordered List...
- In the Actions area, click Edit Feature Permissions...
- In the Edit Feature Permissions, ensure that Script is selected and all other are unselected.
- Click OK.
Although the GAS ISAPI Extension has been allowed automatically when you answered Do you want to allow this ISAPI extension? with Yes, to do it manually:
- In IIS Manager, click the root node, the one that contains the host name.
- In the Features View panel, double-click the ISAPI and CGI Restrictions icon.
- In the ISAPI and CGI Restrictions feature, in the Actions area, click Add...
- In the Add ISAPI or CGI Restriction dialog, enter the path to the GAS ISAPI Extension DLL: FGLASDIR\bin\isapidispatch.dll.
- Enter a description, for example "GAS ISAPI Extension".
- Ensure that the Allow extension path to execute checkbox is checked.
- Click OK.
Post requisites
After you have finished the installation, you now need to configure the GAS ISAPI Extension configuration file, see Finishing the installation .