Model the app
The Business Application diagram allows you to model your application graphically and implement it for use. Wizards generate the code and create forms.
In this task, you work with the Business Application diagram provided by the BAM. It shows the flow of your program.
-
Right-click the Account entity, and select
Add Relation To. Drag the arrow from the
Account to the Orders entity
to create a relation between the forms.
Figure: Defining a master-detail relationship between forms 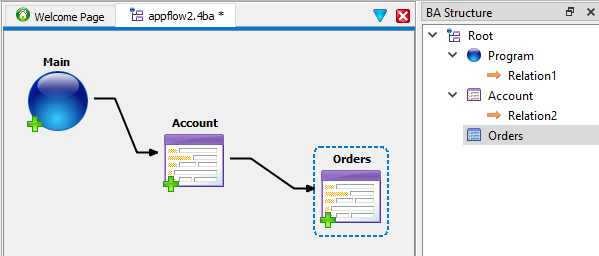
Implement the master form
From the BA diagram, implement the CRUD form from database, and select fields from the table.
-
Select the officestore database and the
account table. Select the first ten fields and use the
single right arrow to add these fields to the Selected
Fields list.
Figure: New Form from Database wizard Column selection 
-
Set Number of fields to
1, and click Finish.
Figure: New Form from Database wizard container selection 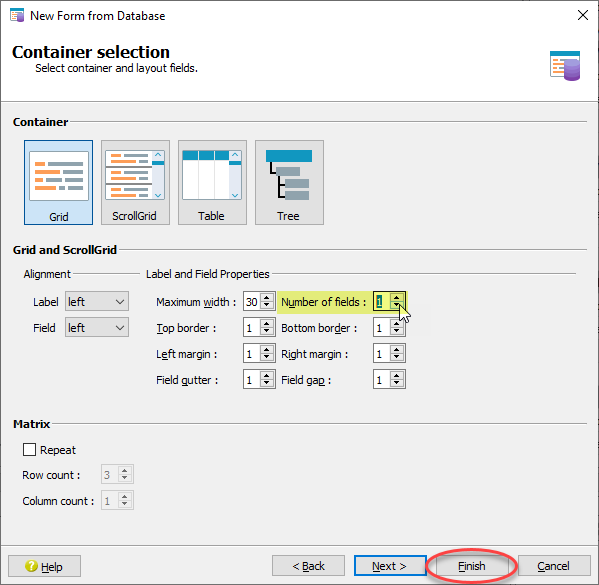
The fields are added to the form, contained in a grid container.
-
Edit the labels on the form (right-click on each label, select Edit
Text).
Figure: Account form with edited labels 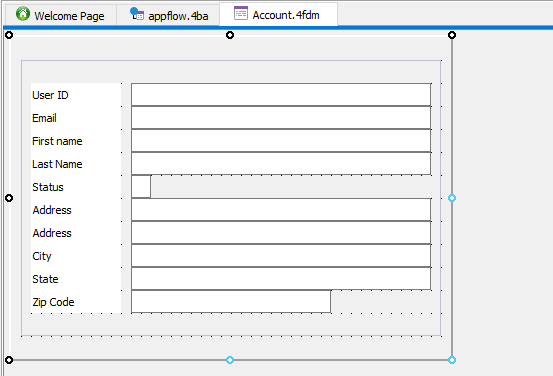
-
Save the form in the
$ProjectDir/src directory and
insert it in the project under the src/Entities node.
Figure: Saving the form 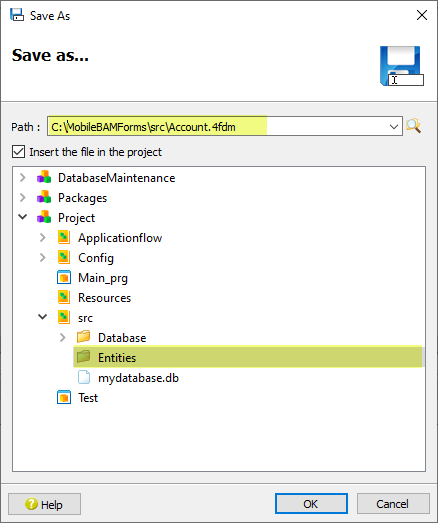
Implement the detail form
From the BA diagram, implement a CRUD form from database for the detail form. Set the relation properties between the master and detail form.
-
Select the relation between the Account and
Orders entities and set the following
properties.
- Under Filter, set Source Field to account.userid and Destination Field to orders.userid.
- Under Source UI Settings , set to orders.
- Under Functionality , select disable Add, disable Modify, and disable Delete.
Figure: Defining a relationship between the master and detail form 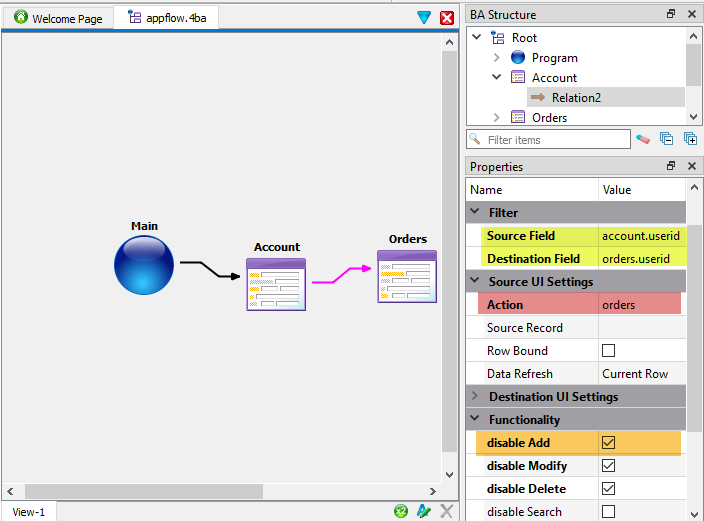
Implement the edit form
Add an edit form to edit the order detail.
A user may want to edit an order and expects to be able to tap (double click) the row to go to a form populated with the selected record. This is achieved in the mobile app by creating a form similar to the Orders form but with a Grid layout instead of a Table.
-
Select the relation between the Orders and the
EditOrder entity and set the following
properties:
- Under Filter, set both Source Field and Destination Field to orders.orderid.
- Under Source UI Settings , set to open_EditOrder_form.
- Under Functionality , select disable Add.
- Under MODIFY Behavior , set both On accept and On cancel to Exitform.
Figure: Defining a relation between Orders and EditOrder forms 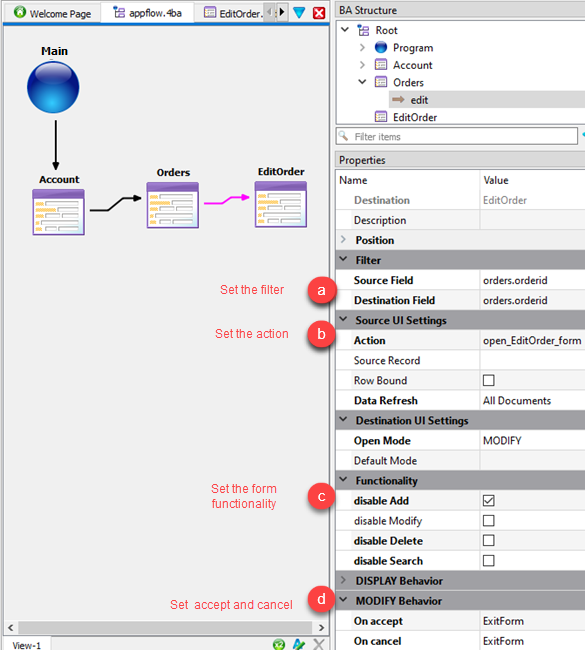
Implement the program
From the BA diagram, implement the program module.
- Right-click the Main program entity and select Implement Program.
- Save the program file as Main.4prg in the $ProjectDir/src directory, and insert it in the project under the Main_prg node. This file is used to generate the source code for the main function. Click OK to close the Save As dialog.
- Select .