Implementing a program entity on the BA diagram creates the 4prg
file, which is used to generate the program code.
Open the BA diagram to which you want to add a program.
Right-click on the diagram and select New > Program to add a new Program entity.
Rename the Program entity.
In the Projects view, create an application node to hold the program.
A configuration node is automatically created as a child of the application
node.
Ensure that the Language property of the application
node is set to Genero (no link).
Right-click the program entity and select Implement
Program.
In the Path field, name the 4prg
file including the full path.
Note:
It is recommended that you save the file to the src
directory of your project.
Ensure the Insert the file in the project checkbox is
selected, and select the application node you created.
Click OK to save the program.
Select the configuration node, and set the BinaryName
property to the name of the program entity file with a _prg
suffix. For example, if the program entity file is
MyApp.4prg, the BinaryName
should be MyApp_prg.
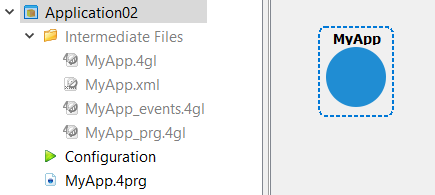
The project now contains:
The 4prg file
The Intermediate Files folder, with placeholders for the
4gl and xml source files to be
generated.
Figure: Program entity following implementation
Note:
One of the intermediate files
(program_prg.4gl) matches the binary
name of the configuration node
program_prg. This means that when
you execute the application, you are executing the generated
program_prg.42m file.